Note: You can use a hoist for better access under the machine.
Park the machine on a level surface and engage the parking brake.
Shut off the cutting units and ensure that the traction pedal is in the NEUTRAL position.
Shut off the engine and remove the key.
Parts needed for this procedure:
| Ballast plate | 4 |
| Carriage screw | 2 |
| Rubber bumper | 1 |
| Self-tapping screw | 1 |
Remove the existing hardware from the front of the mower deck (Figure 1). Retain the nuts for later installation.
Note: You may discard the removed carriage screws.
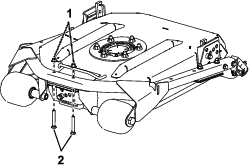
Align the ballast plates above the tube frame and install the long kit carriage screws with the nuts removed in step 1 (Figure 2).
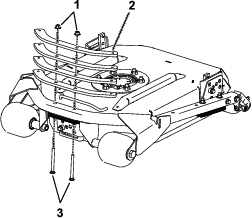
Important: For the rear-center decks beneath the machine, complete the following steps to avoid contacting the hoses with the ballast weights.
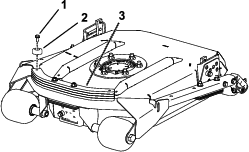
Install the rubber bumper to the side of the ballast plate closest to the center of the machine with the self-tapping screw (Figure 3).
Note: There is a hole started on the ballast plate to make installing the self-tapping screw easier and to show the proper location for installing the bumper.
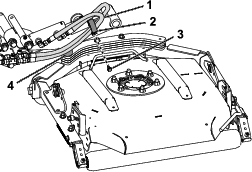
Remove the self-tapping screw and R-clamp from the lift cylinder tube-arm above the deck (Figure 4). Remove the R-clamp from the hoses.
Note: Retain the self-tapping screw for installing the R-clamp later.
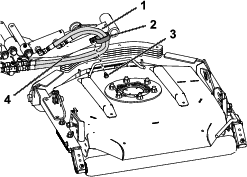
Align the R-clamp perpendicular to the lift cylinder tube-arm and install the hoses so that they are pushed up from the ballast plates (Figure 5). Install the R-clamp with the self-tapping screw removed in step 4.
