The blade is sharp; contacting the blade can result in serious personal injury.
Wear gloves when servicing the blade.
Shut off the engine and wait for all moving parts to stop.
Disconnect the spark-plug wire from the spark plug and remove the electric-start button (if present).
Tip the machine onto its side with the air filter up.
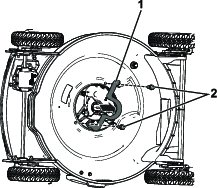
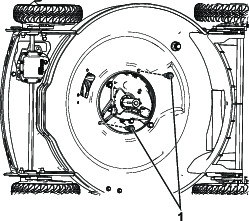
Use a block of wood to hold the blade steady (Figure 1).
Remove the blade, saving all mounting hardware (Figure 1).
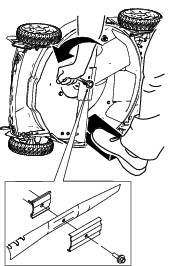
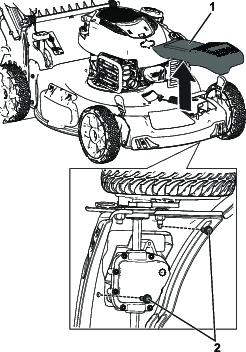
Loosen the 5 bolts that hold the rear baffle in place.

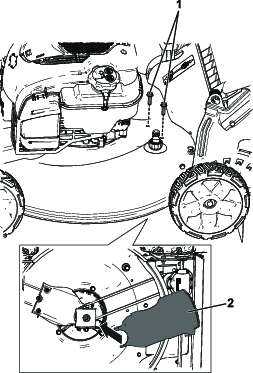
Remove and retain the lower, rear belt cover and corresponding bolts (Figure 3).
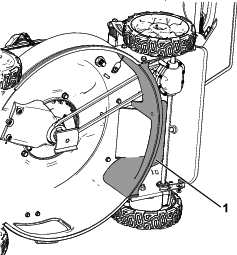
Remove both belts from the blade drive and then remove and retain the blade drive (Figure 4).
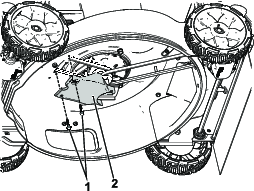
Remove and discard the metal belt guide and 2 corresponding bolts (Figure 5).
Remove and discard the front belt cover; retain the corresponding bolts (Figure 6).
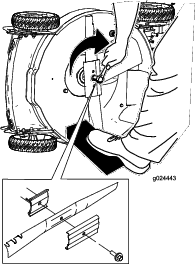
If needed, center punch and then drill 2 holes (9/32 inch) through the deck for installation of the belt covers.
Note: Use the template at the back of these instructions for the appropriate hole orientation.
Parts needed for this procedure:
| Upper belt cover | 1 |
| Lower belt cover | 1 |
| Bolt (1/4 x 1.33 inches) | 2 |
| Engine-mount bolt (3/8 x 1 inch) | 2 |
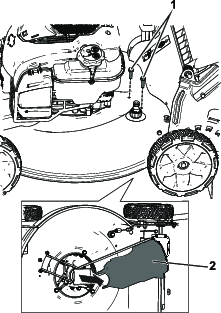
Install the 2 engine-mount bolts (3/8 x 1 inch) and torque them to 400 in-lb (Figure 7).
Install the upper, front belt cover provided in this kit with the bolts previously removed.

Install the blade drive and route both belts around it as shown in Figure 8.
Note: The blade spacer need to remain inside of the blade drive.
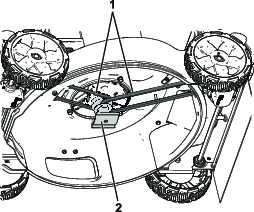
Install the lower, front belt cover by threading 2 bolts (1/4 x 1.33 inches) through the lower belt cover, through the holes drilled (if applicable), and into the upper belt cover.
Tighten the 5 bolts that hold the rear baffle in place (Figure 10).
Install the lower, rear belt cover with the corresponding bolts that you previously removed. Insert the back of the cover into the rear discharge chute and then lower the front in place (Figure 12).
Note: Ensure that the rear belt does not get pinched between the side wall and bolts when installing the lower, rear belt cover.
Important: You will need a torque wrench to install the blade properly. If you do not have a torque wrench or are uncomfortable performing this procedure, contact an Authorized Service Dealer.
Install the new blade and all mounting hardware (Figure 13).
Important: Position the curved ends of the blade to point toward the machine housing.
Use a torque wrench to tighten the blade bolt to 82 N∙m (60 ft-lb).
Important: A bolt torqued to 82 N∙m (60 ft-lb) is very tight. While holding the blade with a block of wood, put your weight behind the ratchet or wrench and tighten the bolt securely. This bolt is very difficult to overtighten.
Important: If you are printing this from www.Toro.com, ensure
that it is printed at 100% scale and that the distance from A to B
is 1 inch:  .
.
