Maintenance
Recommended Maintenance Schedule(s)
| Maintenance Service Interval | Maintenance Procedure |
|---|---|
| Before each use or daily |
|
| Every 25 hours |
|
| Every 200 hours |
|
| Before storage |
|
Caution
If you leave the key in the switch, someone could accidently start the engine and seriously injure you or other bystanders.
Remove the key from the switch before you perform any maintenance.
Greasing the Plow
| Maintenance Service Interval | Maintenance Procedure |
|---|---|
| Before each use or daily |
|
| Before storage |
|
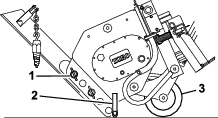
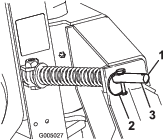
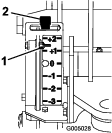
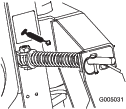
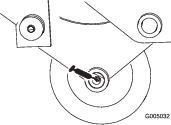
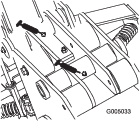
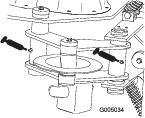
Grease the 6 fittings, as shown in Figure 11 through Figure 14, every 8 operating hours. Grease all fittings immediately after every washing.
Grease Type: General-purpose grease
-
Park the machine on a level surface, disengage the auxiliary hydraulics lever, lower the attachment, and engage the parking brake (if equipped).
-
Shut off the engine and remove the key
-
Connect a grease gun to each fitting.
-
Pump grease into the fittings until grease begins to ooze out of the bearings.
-
Wipe up any excess grease.
Servicing the Gear Lube
Gear-lube type: SAE 90-140 API service GL-4 or GL-5
Capacity: 1.4 L (47 fl oz)
Checking the Gear-Lube Level
| Maintenance Service Interval | Maintenance Procedure |
|---|---|
| Every 25 hours |
|
| Before storage |
|
-
Park the machine on a level surface, disengage the auxiliary hydraulics lever, and lower the attachment so that the plow is on the ground. Engage the parking brake (if equipped).
-
Stop the engine and remove the key.
-
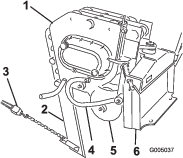
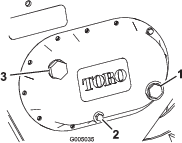
Check the clear glass gauge on the side of the gear case (Figure 15).
Note: The gear lube should be at the level of the red dot in the center of the gauge.
-
If the gear-lube level is low, remove the fill plug (Figure 15) and fill the case with gear lube until it is level with the red dot in the gauge.
-
Replace the fill plug.
Changing the Gear Lube
| Maintenance Service Interval | Maintenance Procedure |
|---|---|
| Every 200 hours |
|
-
Park the machine on a level surface, disengage the auxiliary hydraulics lever, and lower the attachment so that the plow is on the ground. Engage the parking brake (if equipped).
-
Stop the engine and remove the key.
-
Prepare an appropriate container to catch the used oil under the plow.
-
Remove the drain plug (Figure 15), allowing the oil to spill out into the container.
-
When finished, replace the drain plug, ensuring that it is tight.
-
Remove the fill plug (Figure 15) and fill the case with gear lube until it is level with the red dot in the gauge.
-
Replace the fill plug.
Replacing the Coulter
If the coulter becomes excessively worn or damaged, replace it.
-
Park the machine on a level surface, disengage the auxiliary hydraulics lever, lower the attachment, and engage the parking brake (if equipped).
-
Shut off the engine and remove the key
-
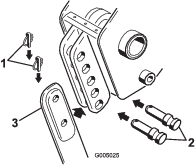
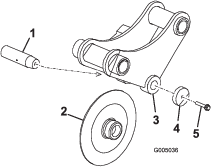
Back out the coulter-pin screw about 1.3 cm (0.5 inch), then strike it several times with a hammer to loosen the pin (Figure 16).
-
Completely remove the coulter-pin screw, washer, coulter, and coulter pin (Figure 16).
-
Put the new coulter into the coulter bracket (Figure 16).
-
Slide the coulter pin through the bracket and coulter and secure it with the coulter-pin screw and washer (Figure 16).
-
Torque the screw to 61 N∙m (45 ft-lb).
