Setup
Preparing the Machine
-
Park the machine on a level surface.
-
Engage the parking brake.
-
Shut off the engine and remove the key.
-
Disconnect the battery; refer to your Operator’s Manual.
-
Raise the cargo bed to the dump position and secure it with the prop rod.
Installing the Rear Mounting Tubes to the Existing Canopy
Parts needed for this procedure:
| Rear mounting tube | 2 |
| Carriage bolt (5/16 x 3-1/2 inches) | 4 |
| Flange nut (5/16 inch) | 4 |
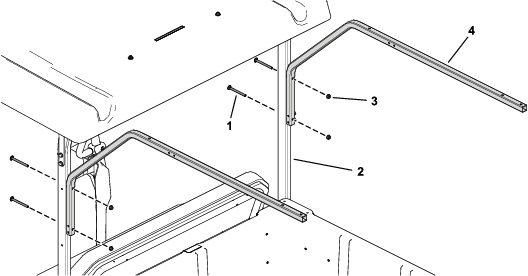
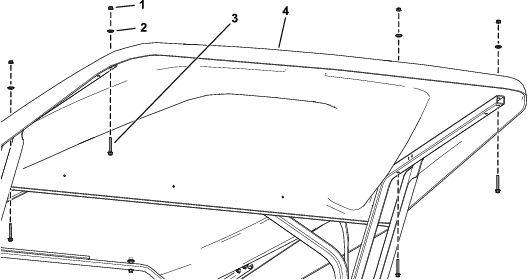
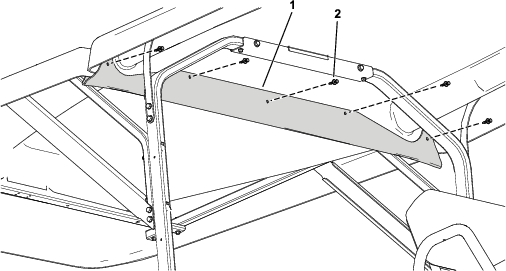
Secure the 2 rear mounting tubes to the existing canopy rear tubes using the 4 carriage bolts (5/16 x 3-1/2 inches) and 4 flange nuts (5/16 inch) as shown in Figure 1.
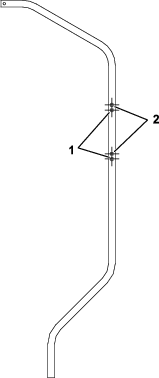
If you are installing on a 2-person canopy (Model 07921), install rear mounting tubes in the bottom holes on the existing rear tubes (Figure 2).
If you are installing on a 4-person canopy (Model 07922), install rear mounting tubes in the top holes on the existing rear tubes (Figure 2).
Installing the Support Brackets
Parts needed for this procedure:
| Support bracket | 2 |
| Hex-washer head bolt (5/16 x 3/4 inch) | 8 |
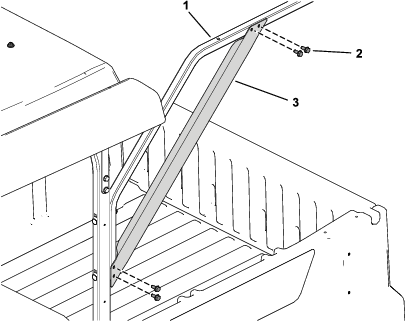
Secure the 2 support brackets to the rear mounting tubes using 8 hex-washer head bolts (5/16 x 3/4 inch) as shown in Figure 3.
Installing the Canopy Extension
Parts needed for this procedure:
| Canopy extension | 1 |
| Canopy support bracket | 1 |
| Sealing washer | 6 |
| Locknut (1/4 inch) | 6 |
| Flange-head bolt (1/4 x 2-1/4 inches) | 2 |
| Flange-head bolt (1/4 x 1-3/4 inches) | 4 |
| Trim seal | 1 |
| Spacer | 2 |
-
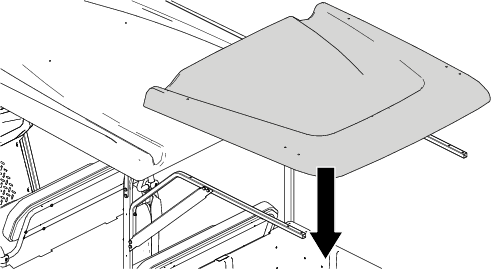
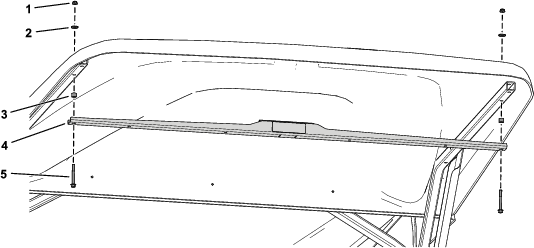
Place the canopy extension on top of the installed rear tube mounts (Figure 4).
-
Secure the canopy extension using 4 flange-head bolts (1/4 x 1-3/4 inches), 4 sealing washers, and 4 locknuts (1/4 inch) as shown in Figure 5.
-
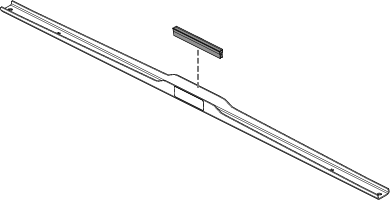
Install the trim seal onto the canopy support bracket (Figure 6).
-
Secure the canopy support bracket to the canopy extension using 2 flange-head bolts (1/4 x 2-1/4 inches), 2 spacers, 2 sealing washers, and 2 locknuts (1/4 inch) as shown in Figure 7.
Installing the Rain Gutter
Parts needed for this procedure:
| Rain gutter | 1 |
| Plastic rivet | 10 |
-
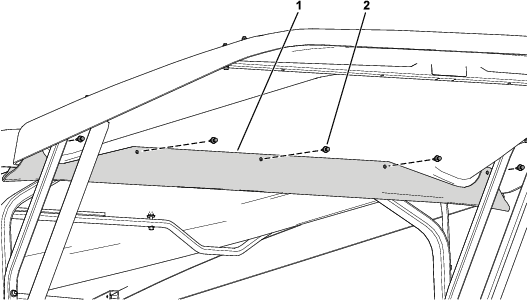
Secure the rain gutter to the canopy extension side using 5 plastic rivets (Figure 8).
Note: The orientation of the holes differ on each side of the rain gutter. Ensure that the holes align with the canopy extension before installing the plastic rivets.
-
Using the rain gutter as the template, drill 5 holes (6.4 mm or 1/4 inch) into the front canopy (Figure 9).
-
Secure the rain gutter to the front canopy side using 5 plastic rivets (Figure 10).
Connecting the Battery
Connect the battery; refer to your Operator’s Manual.