Setup

Installing the Tri-Roller Units

  1. Park the machine on a level surface, shut off the engine, engage the parking brake, and remove the key.

  2. Position the tri-roller unit under the suspension arm.

  3. With the latches on the suspension-arm bar pointing up (Figure 1), push the suspension arm down so that the bar fits over the bar across the top of the tri-roller unit (Figure 2).

    g018311
    g018312
  4. Close the latches down and around the tri-roller unit and lock them in place (Figure 1).

    Note: You will hear and feel a “click” when the latches are properly locked in place.

  5. Insert the motor into the left side of the tri-roller unit (as viewed from the operator’s position) and pull the motor retaining bar on the tri-roller unit toward the motor until you hear a “click” from both sides of the motor (Figure 3).

    g014690

Removing the Tri-Roller Unit

  1. Park the machine on a clean level surface, lower the tri-roller units to the ground until the suspension hydraulics are fully extended, shut off the engine, engage the parking brake, and remove the key from the ignition switch.

  2. Push the motor retaining bar out of the slots on the motor toward the tri-roller unit and remove the motor from the tri-roller unit.

    g014605
  3. Move the motor to the storage location on the front of the suspension arm.

    Note: Do not raise the suspension to the transport position when the reel motors are in the holders in the machine frame. Damage to the motors or hoses could result. If you must move the traction unit without the tri-roller units installed, secure them to the suspension arms using cable ties.

  4. Open the latches on the suspension-arm bar of the tri-roller unit you are removing.

  5. Disconnect the latches from the tri-roller unit bar.

  6. Roll the tri-roller unit out from under the suspension arm.

  7. Repeat steps 2 through 6 for the other tri-roller units as required.

Adding Rear Weight

Parts needed for this procedure:

Weight kit, 119-7129 (purchase separately)1

This machine complies with the ANSI B71.4-2012 and EN ISO 5395:2013 Standards when equipped with the Weight Kit, Part No. 119-7129.

Operation

Installing the Electrical Counterweights

Note: If the Tri-roller is installed on greensmower models 04530 or 04540, you must use an additional hybrid counterweight.

  1. Remove and discard the counterweight bolts.

  2. Install 2 bolts (5/16-18 x 2 3/4 inch) as shown in Figure 5.

    Note: These bolts are not included with this kit. Toro part number: 322-33.

  3. Install 4 spacers (1/8 inch) per bolt between the counterweight and the tri-roller side plate (Figure 5).

    Note: These spacers are not included with this kit. Toro part number: 63-8410.

  4. Install the hybrid auxiliary weight provided with the traction unit with the provided bolts.

g254873

Training Period

Before rolling greens, find a clear area and practice starting, stopping, raising, lowering, and rolling with the tri-roller.

Operating Tips

Maintain a straight line when rolling. Do not turn when the tri-rollers are on the ground.

When the edge of the green has been reached, raise the tri-rollers before turning or stopping. You must completely raise the tri-rollers before making turns. Survey the green to determine if there are any obstacles that will be damaged or will result in damage to the rollers, such as sprinkler heads and protruding objects.

Maintenance

Lubricating the Tri-Roller

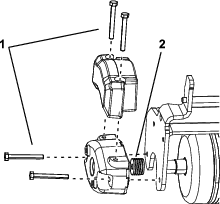
Lubricate the 2 grease fittings (Figure 6) on each tri-roller unit after every 15 hours of operation, with No. 2 lithium grease. Use a hand-operated grease gun for best results.

  1. Wipe each grease fitting with a clean rag.

  2. Apply grease to the tri-roller shaft bearings until you feel pressure (Figure 6).

    g018317
  3. Wipe excess grease away.