Warning
CALIFORNIA
Proposition 65 Warning
Use of this product may cause exposure to chemicals known to the State of California to cause cancer, birth defects, or other reproductive harm.
Safety
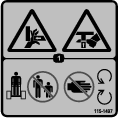
Safety and Instructional Decals
 |
Safety decals and instructions are easily visible to the operator and are located near any area of potential danger. Replace any decal that is damaged or missing. |

Installation
Warning
Contact with moving parts can result in personal injury.
-
Keep your fingers, hands, and clothing away from moving parts.
-
Never attempt to manipulate the attachment while the engine is running.
Installing the Crumber
-
Park the machine on a level surface, engage the parking brake (if equipped), and lower the loader arms.
-
Shut off the engine and remove the key.
-
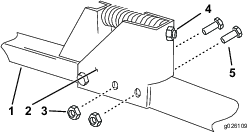
Slide the crumber mounting bracket over the end of the safety bar on the trencher, aligning the holes in the bracket with the holes in the bar (Figure 1).
-
Secure the bracket to the bar using 2 bolts and nuts (Figure 1).
Operation
Adjusting the Crumber
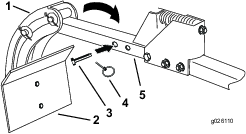
Adjust the crumber so that the crumber blade is within 3.8 to 6.35 cm (1-1/2 to 2-1/2 in) from the trencher teeth. To adjust the crumber, loosen or tighten the adjustment nut as needed (Figure 1).
Transporting the Crumber
Before transporting the trencher with the crumber attached, complete the following procedure:
-
Park the machine on a level surface, engage the parking brake (if equipped), and lower the loader arms.
-
Shut off the engine and remove the key.
-
Remove the cotter pin and cotter pin stored in the crumber bar.
-
Slide the crumber back as far as possible (Figure 2).
-
Install the clevis pin through the crumber slide and bar, securing it with the cotter pin (Figure 2).
Changing the Scraper
The scraper (Figure 2) installed on the crumber must correspond to the width of the trencher chain. To replace the scraper that is on the crumber, remove the 2 bolts and 2 nuts securing the scraper, then install the new scraper in its place.
Note: The scrapers are slightly narrower than the chains with which they should be paired. For example, the 6-inch scraper is actually 5-1/2 inches wide but is intended to be used with the 6-inch trencher chain.