


Техническое обслуживание
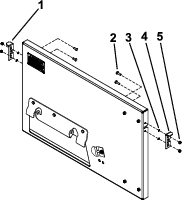
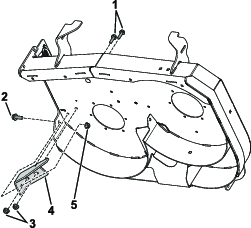
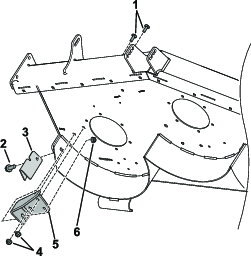
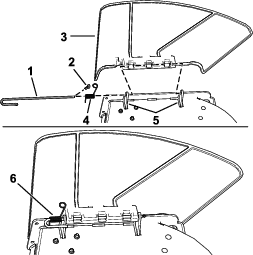
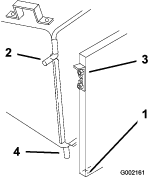
Inspecting the Bagger
| Периодичность технического обслуживания | Порядок технического обслуживания |
|---|---|
| Через первые 10 часа |
|
| Перед помещением на хранение |
|
-
Inspect all the fasteners and latches; replace any that are missing or damaged.
-
Inspect the bag for damage and replace any damaged parts.
-
Tighten all hardware.
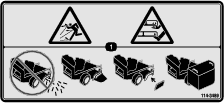
Предупреждение
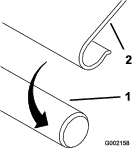
You or bystanders could be severely injured by flying debris or thrown objects that may pass through torn, worn, or deteriorated grass bags.
-
Check the grass bags for holes, rips, wear, and other deterioration.
-
If the bag has deteriorated, install new grass bags supplied by the manufacturer of this bagger attachment.
-
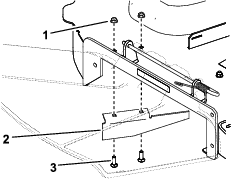
Cleaning the Bagger
| Периодичность технического обслуживания | Порядок технического обслуживания |
|---|---|
| Перед каждым использованием или ежедневно |
|
Clean the bagger after each use.
-
Remove the bag and wash the back plate and the underside of the machine. Use a mild automotive detergent to remove stubborn dirt.
Important: Do not pressure wash the bagger.
-
Remove matted grass from all parts.
-
After washing, let all parts dry thoroughly.
Note: Do not wash the grass bag.
Storing the Grass Catcher
-
Clean the bagger; refer to Cleaning the Bagger.
-
Inspect the bagger for damage; refer to Inspecting the Bagger.
-
Ensure that the bag is empty and dry.
-
Store the bagger in a clean, dry place, out of direct sunlight. This extends the life of the bagger. If you must store it outside, cover it with a weatherproof cover.