You may contact Toro directly at www.Toro.com for product and accessory information, help finding a dealer, the complete warranty details, or to register your product.
Warning
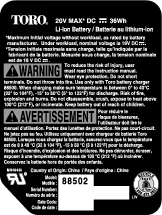
CALIFORNIA
Proposition 65 Warning
The power cord on this product contains lead, a chemical known to the State of California to cause birth defects or other reproductive harm. Wash hands after handling.
Safety
Important safety instructions—Save these instructions.
Danger
To reduce the risk of fire or electric shock, carefully follow these instructions:
-
Be sure voltage selector is in correct voltage position before plugging in.
-
For use in the U.S.A., the voltage selector switch must be placed in the 120 volt position. For use in countries other than the U.S.A., the voltage selector may need to be placed in other than the 120 volt position. Confirm the voltage available at each country location before using the product.
-
For connection to a supply not in the U.S.A., use an attachment plug adapter of the proper configuration for the power outlet, if needed.
Caution
The battery used in this device may present a risk of fire or chemical burn if mistreated.
Do not disassemble, heat above 104 degrees F (40 degrees C), or incinerate. Replace battery with Toro genuine batteries only. Use of another battery may present a risk of fire or explosion.
Caution
Dispose of a used battery promptly. Keep away from children. Do not disassemble and do not dispose of in fire.
Caution
Overheating batteries can cause fire and severe burns.
Do not open, crush, heat above 104 degrees F (40 degrees C), or incinerate. Follow the manufacturer’s instructions.
This power unit is intended to be correctly orientated in a vertical or floor mounted position.
Safety and Instructional Decals
 |
Safety decals and instructions are easily visible to the operator and are located near any area of potential danger. Replace any decal that is damaged or missing. |

Setup
Charging the Battery Pack
-
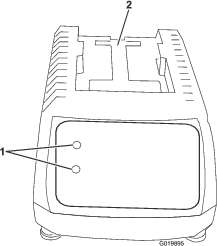
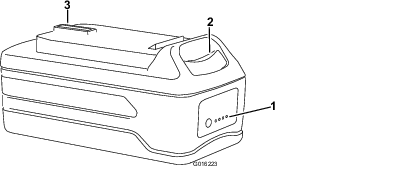
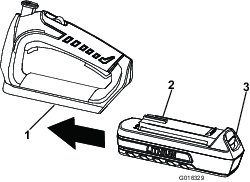
Turn the battery upside down and line up the battery terminal with the slot in the charger (Figure 1 and Figure 2).
-
Slide the battery into the charger until it clicks into place.
-
To remove the battery, press down on the release button and slide the battery backwards out of the charger.
-
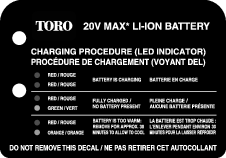
Refer to the table below to interpret the LED indicators on the battery charger.
| LED COLOR | ||
| Top | Bottom | Indicates: |
| Red | Red | Battery is charging |
| Red | Green | Fully charged |
| Red | Orange | Battery is too warm: Remove for approximately 30 minutes |
Inserting the Battery into the Trimmer
-
Align the tongue of the battery pack with the cavity in the handle housing (Figure 3).
-
Grasp the trimmer handle.
-
Push the battery pack into the handle until the latch locks into place.
Important: The battery pack is not fully charged when it is purchased. Before using the trimmer for the first time, place the battery pack in the charger and charge it until the LED indicators turn green. Make sure to read all safety precautions. With regular use, it will need shorter charging time. If storing for a prolonged period of time, remove the battery. When ready to use again, charge the battery pack until the LED indicators turn green.
Battery Pack Preparation For Recycling
Warning
Upon removal, cover the battery pack's terminals with heavy-duty adhesive tape. Do not attempt to destroy or disassemble the battery pack or remove any of its components. Lithium-ion batteries must be recycled or disposed of properly at the nearest battery recycling facility.
Troubleshooting
Using the battery when it is hot can reduce the operating time. The battery will automatically stop working when it is overheated to prevent damage to it. Remove the battery from the charger and allow it to cool before placing it back into the trimmer.
Using the battery when there is moisture on the leads can cause the trimmer to malfunction. Allow the battery to dry or wipe it dry before placing it back into the trimmer.