Installation
Installing the Kit
Note: Retain all hardware.
-
Park the machine on a level surface, shut off the engine, turn the battery disconnect switch to the OFF position, and remove the key.
-
Drain the coolant from the system; refer to the Operator’s Manual.
-
Remove the front and rear hoods.
-
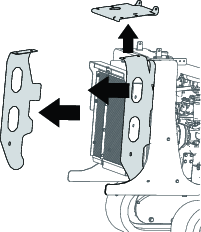
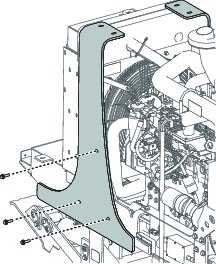
Remove the side guide plates and the hood hinge plate.
-
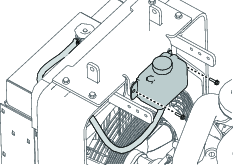
Disconnect the coolant reservoir hose and remove the coolant reservoir and bracket.
-
Remove the rear hood shock mount.
-
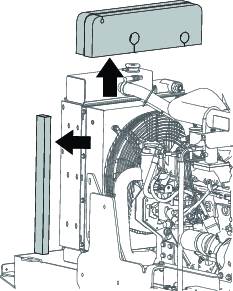
Remove the support shroud.
-
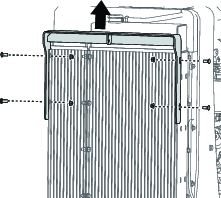
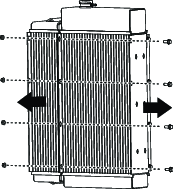
Using 2 people, remove the side plates.
-
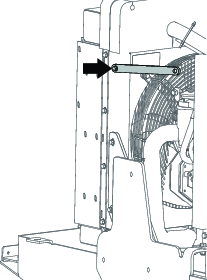
Loosen the bolts on both of the cooling shroud straps.
-
Remove the foam pieces.
-
Disconnect and plug the hydraulic hoses.
-
Disconnect the radiator hoses.
-
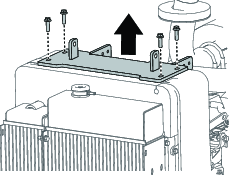
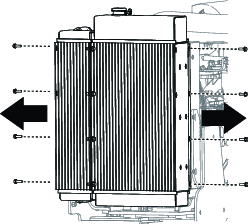
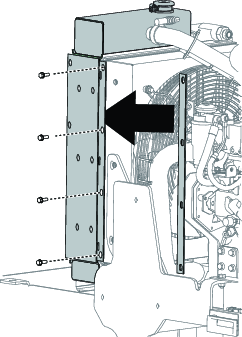
Remove and disconnect the cooling assembly.
-
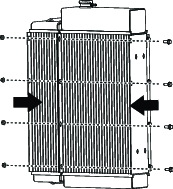
Using the hardware from the previous assembly, connect the 2 new coolers on both sides.
-
Place the cooler assembly in place, slide the shims in between the cooler assembly and cooler shroud and secure with the previously removed hardware.
-
Install the components in reverse order.
-
Torque all the fasteners to the following specifications:
-
3/8 inch bolts to 37 to 45 N∙m (27 to 33 ft-lb)
-
5/16 inch bolts to 1978 to 2542 N∙cm (175 to 225 in-lb)
-
M6 bolt to 972 to 1198 N∙cm (86 to 106 in-lb)
-
M8 bolt to 23 to 29 N∙m (17 to 21 ft-lb)
-
M10 bolt to 47 to 57 N∙m (34 to 42 ft-lb)
-