 WARNINGRead all safety warnings, instructions,
illustrations and specifications provided with this power tool.Failure to follow all instructions
listed below may result in electric shock, fire, and/or serious injury.
WARNINGRead all safety warnings, instructions,
illustrations and specifications provided with this power tool.Failure to follow all instructions
listed below may result in electric shock, fire, and/or serious injury. ).
).


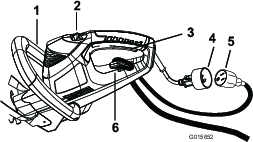
Maintenance
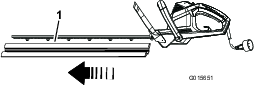
Oiling the Trimmer Blade
-
Stop the motor and disconnect from power supply.
-
Clean dirt and debris from the body of the hedge trimmer, using a damp cloth with a mild detergent.
Note: Do not use any strong detergents on the plastic housing or the handle. They can be damaged by certain aromatic oils such as pine and lemon, and by solvents such as kerosene.
-
Lay the hedge trimmer on a flat surface. Apply light weight machine oil along the edge of the top blade. If you will be using the hedge trimmer for an extended period of time, it is advisable to oil the blade during use.
Note: Do not oil while the hedge trimmer is running.