Installation
Preparing the Machine
-
Park the machine on a level surface.
-
Engage the parking brake.
-
Lower the cutting units.
-
Shut off the machine and remove the key.
-
Disconnect the main-power connectors; refer to your machine Operator’s Manual.
Installing the Lights
Parts needed for this procedure:
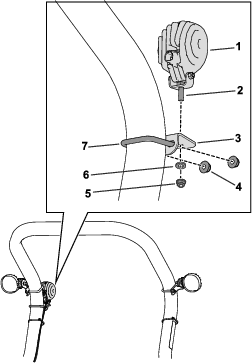
| Light assembly | 1 |
| Bracket | 1 |
| U-bolt | 1 |
| Nut (3/8 inch) | 2 |
-
Use the bolt, washer, and nut included with the light assembly to install the light on the bracket as shown in Figure 1.
-
Install the bracket onto the right side of the roll bar using a U-bolt and 2 nuts (3/8 inch) as shown in Figure 1.
Note: Observe the length of the wire-harness connector labeled . Position the light in an area that allows this connector to be installed to the light.
-
Remove the cap from the connector labeled and connect it to the light.
Completing the Installation
-
Connect the main-power connectors; refer to your machine Operator’s Manual.
-
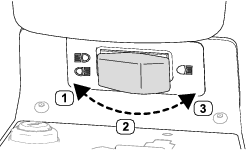
Use the switch (Figure 2) to test if the rear light is functioning:
-
Moving the switch to the RIGHT position activates the headlights and rear light).
-
Moving the switch to the MIDDLE position turns off the lights.
-
Moving the switch to the LEFT position activates the headlights only.
-