Installation
Preparing the Machine
-
Park the machine on a level surface.
-
Engage the parking brake.
-
Lower the cutting units.
-
Shut off the machine and remove the key.
-
Disconnect the main-power connectors; refer to your machine Operator’s Manual.
Removing the Existing Choke Cable
Removing the Choke Cable from the Engine
Take note of the cable routing from the engine to the console. The new cable follows the same routing direction as the old cable.
-
Raise the hood.
-
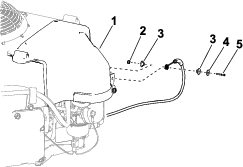
Remove the hardware that secures the choke cable to the engine (Figure 1).
-
Remove the choke cable from the engine.
Installing the Choke Cable
Parts needed for this procedure:
| Choke cable | 1 |
| Cable tie | 3 |
| Spacer | 2 |
| Washer | 1 |
| Bolt | 1 |
| Nut | 1 |
Installing the Choke Cable to the Console
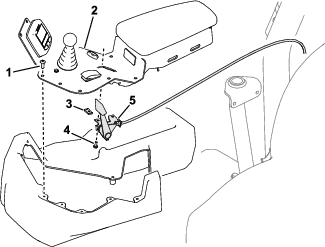
Refer to Figure 2 for this procedure.
-
Use the previously removed bolts and speed nuts to secure the choke cable to the console plate.
-
Use the previously removed 10 button-head screws to secure the console plate to the console.
Routing the Choke Cable
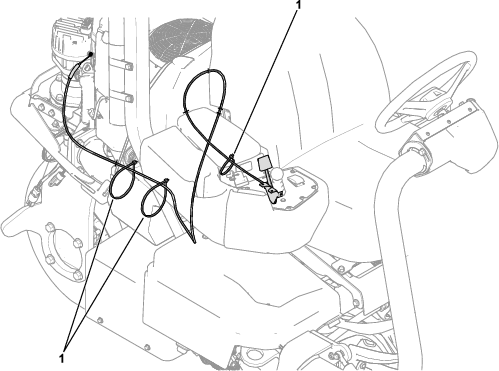
Route the choke cable as shown in Figure 3.
Note: The new cable follows the same routing direction as the old cable.
Installing the Choke Cable to the Engine
-
Set the choke lever to the full OPEN position.
-
Use the bolt, spacers, washer, and nut to secure the choke cable to the choke lever at the carburetor (Figure 1).
-
Set the choke lever at the carburetor to the full CLOSED position.
Completing the Installation
Install cable ties to secure the choke cable in-place as shown in Figure 3.