
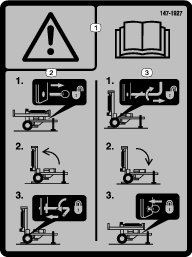
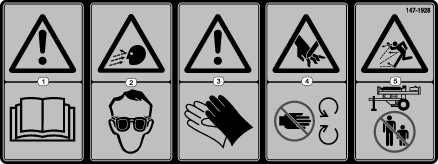
 , which means Caution, Warning,
or Danger—personal safety instruction. Failure to comply with
these instructions may result in personal injury or death.
, which means Caution, Warning,
or Danger—personal safety instruction. Failure to comply with
these instructions may result in personal injury or death.
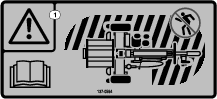
Maintenance
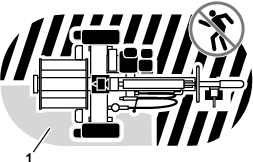
Determine the left and right sides of the machine from the normal operating position.
Maintenance Safety
-
Before repairing the machine do the following:
-
Park the machine on level ground and adjust the jack stand to ensure that the machine is level.
-
Fully retract the splitting wedge.
-
Shut off the engine.
-
Disconnect the spark-plug wire.
-
-
Clean grass and debris from the muffler and engine to help prevent fires.
-
Clean up oil or fuel spills.
-
Do not allow untrained personnel to service the machine.
-
Use jack stands to support the machine and/or components when required.
-
Carefully release pressure from components with stored energy.
-
Remove the spark-plug wire before making any repairs.
-
Keep your hands and feet away from moving parts. If possible, do not make adjustments with the engine running.
-
Keep all parts in good working condition and all hardware tightened. Replace all worn or damaged decals.
-
Never interfere with the intended function of a safety device or reduce the protection provided by a safety device. Check their proper operation regularly.
-
To ensure optimum performance and continued safety certification of the machine, use only genuine Toro replacement parts and accessories. Replacement parts and accessories made by other manufacturers could be dangerous, and such use could void the product warranty.
Recommended Maintenance Schedule(s)
| Maintenance Service Interval | Maintenance Procedure |
|---|---|
| After the first hour |
|
| After the first 10 hours |
|
| After the first 20 hours |
|
| Before each use or daily |
|
| Every 50 hours |
|
| Every 100 hours |
|
| Every 300 hours |
|
| Every 500 hours |
|
| Yearly |
|
| Yearly or before storage |
|
Note: Refer to your engine owner’s manual for additional maintenance procedures.
Pre-Maintenance Procedures
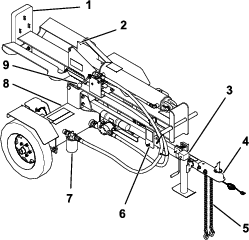
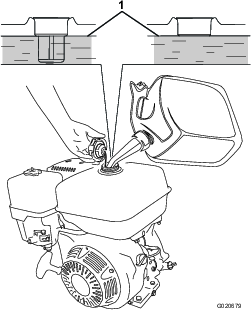
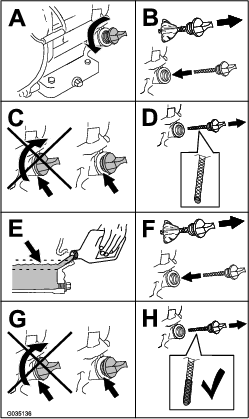
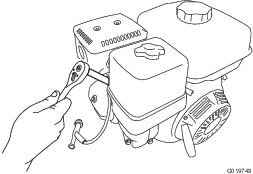
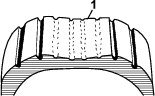
Disconnecting the Spark-plug Wire
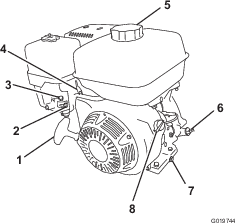
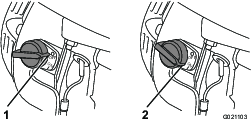
Pull the spark-plug wire off the terminal of the spark plug (Figure 18).
Lubrication
Greasing the Rail
Grease type: General-purpose grease
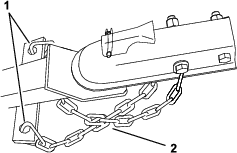
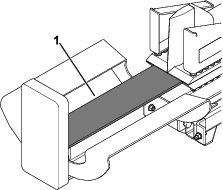
If the splitting wedge gets stuck on the rail, ensure that the beam is not bent and there is nothing obstructing the path of the wedge, then grease the rail. Lubricate both sides of the beam face.
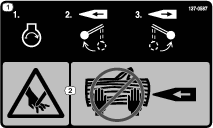
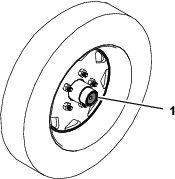
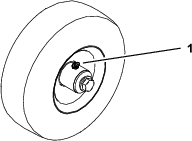
Greasing the Wheel Bearings
| Maintenance Service Interval | Maintenance Procedure |
|---|---|
| Every 500 hours |
|
Grease type: General-purpose grease
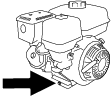
Engine Maintenance
Engine Safety
-
Shut off the engine before checking the oil or adding oil to the crankcase.
-
Do not change the governor speed or overspeed the engine.
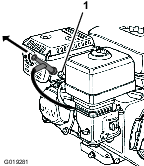
Servicing the Air Cleaner
| Maintenance Service Interval | Maintenance Procedure |
|---|---|
| Before each use or daily |
|
| Every 50 hours |
|
| Every 300 hours |
|
Important: Do not operate the engine without the air-filter assembly; extreme engine damage will occur.
-
Shut off the engine and wait for all moving parts to stop.
-
Disconnect the wire from the spark plug; refer to Disconnecting the Spark-plug Wire.
-
Remove the nut that secures the cover ().
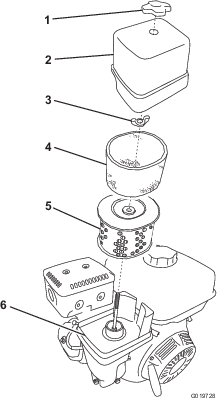
-
Remove the cover.
Note: Be careful to prevent dirt and debris from falling into the base.
-
Remove the foam and paper elements from the base ().
-
Remove the foam element from the paper element ().
-
Inspect the foam and paper elements and replace them if they are damaged or excessively dirty.
Note: Never try to brush dirt off the paper element; brushing forces the dirt into the fibers.
-
Clean the foam element in warm, soapy water or in a nonflammable solvent.
Note: Do not use fuel to clean the foam element because it could create a risk of fire or explosion.
-
Rinse and dry the foam element thoroughly.
-
Dip the foam element in clean engine oil, then squeeze out the excess oil.
Note: Excess oil in the foam element restricts the air flow through the element and may reach the paper filter and clog it.
-
Wipe dirt from the base and the cover with a moist rag.
Note: Be careful to prevent dirt and debris from entering the air duct leading to the carburetor.
-
Install the air-cleaner elements and ensure that they are properly positioned.
-
Securely install the cover with the nut.
Servicing the Engine Oil
Note: Change the oil more frequently when the operating conditions are extremely dusty or sandy.
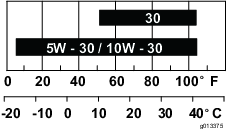
Engine-Oil Specifications
Toro Premium Engine Oil is available from your Authorized Service Dealer.
Oil Type: Detergent oil with an API service of SJ or higher.
Crankcase Capacity: 1.1 L (1.2 US qt)
Viscosity: Refer to the table below.
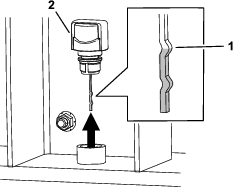
Checking the Engine-Oil Level
| Maintenance Service Interval | Maintenance Procedure |
|---|---|
| Before each use or daily |
|
-
Park the machine on level ground, adjust the jack stand to ensure that the machine is level, and shut off the engine.
-
Allow the engine to cool.
-
Disconnect the wire from the spark plug; refer to Disconnecting the Spark-plug Wire.
-
Clean around the dipstick.
-
Check the oil level as shown in Figure 24.
Changing the Engine Oil
| Maintenance Service Interval | Maintenance Procedure |
|---|---|
| After the first 20 hours |
|
| Every 100 hours |
|
| Yearly or before storage |
|
Note: Dispose of the used oil at a recycling center.
-
Start the engine and let it run for 5 minutes.
Note: This warms the oil so that it drains better.
-
Park the machine on level ground, adjust the jack stand to ensure that the machine is level, and shut off the engine.
-
Disconnect the wire from the spark plug; refer to Disconnecting the Spark-plug Wire.
-
Change the oil as shown in Figure 25.
-
Slowly pour approximately 80% of the specified oil into the filler tube and slowly add the additional oil to bring it to the Full mark (Figure 26).
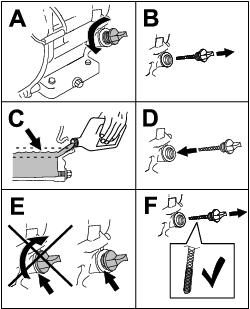
Servicing the Spark Plug
Spark Plug Specifications
Type: NGK BPR6ES or equivalent
Gap: 0.7 to 0.8 mm (0.028 to 0.031 inch)
Note: Use a 21 mm (13/16 inch) spark-plug wrench for removing and installing the spark plug.
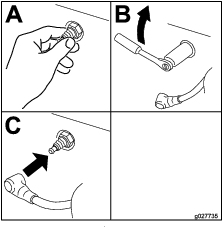
Removing the Spark Plug
-
Park the machine on level ground, adjust the jack stand to ensure that the machine is level, and shut off the engine.
-
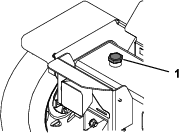
Locate and remove the spark plugs (Figure 27).

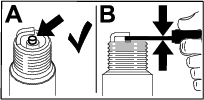
Checking the Spark Plug
| Maintenance Service Interval | Maintenance Procedure |
|---|---|
| Every 100 hours |
|
| Every 300 hours |
|
Important: Do not clean the spark plug(s). Always replace the spark plug(s) when it has: a black coating, worn electrodes, an oily film, or cracks.
If you see light brown or gray on the insulator, the engine is operating properly. A black coating on the insulator usually means the air cleaner is dirty.
Set the gap to 0.70 to 0.80 mm (0.28 to 0.031 inch).
Installing the Spark Plug
Tighten the spark plug(s) to 27 N∙m (20 ft-lb).
Fuel System Maintenance
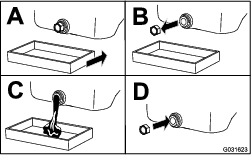
Cleaning the Fuel-Sediment Cup
| Maintenance Service Interval | Maintenance Procedure |
|---|---|
| Every 100 hours |
|
| Yearly or before storage |
|
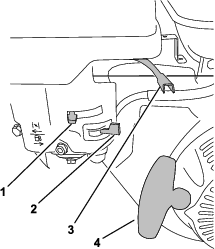
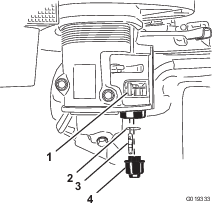
Underneath the fuel valve is a sediment cup to catch dirt in the fuel.
-
Park the machine on level ground, adjust the jack stand to ensure that the machine is level, and shut off the engine.
-
Allow the engine to cool.
-
Disconnect the wire from the spark plug; refer to Disconnecting the Spark-plug Wire.
-
Move the lever of the fuel valve to the OFF position, all the way to the left (Figure 30).
-
Unscrew the fuel-sediment cup (Figure 30).
-
Remove and retain the fuel filter and O-ring (Figure 30).
Note: Do not clean the O-ring in solvent.
-
Clean the fuel filter and sediment cup using a nonflammable solvent, and dry it carefully.
-
Wipe the O-ring with a clean, dry cloth.
-
Install the fuel filter in the bottom of the carburetor (Figure 30).
-
Align the O-ring into the groove in the sediment cup and install the sediment cup to the fuel-valve housing.
-
Move the lever of the fuel valve to the ON position (all the way to the right) and check for leaks. If it leaks, replace the O-ring.
Drive System Maintenance
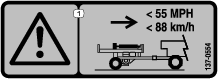
Checking the Tire Pressure
| Maintenance Service Interval | Maintenance Procedure |
|---|---|
| Before each use or daily |
|
Warning
Failure to maintain correct tire pressure may result in tire failure and loss of control, resulting in property damage and serious injury or death.
-
Check the tire pressure frequently to ensure proper inflation. If the tires are not inflated to the correct pressure, they will wear prematurely.
-
Inspect the tire condition before towing and after any operating accident.
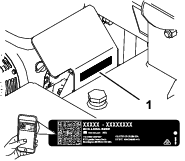
The DOT tire information is located on the side of each tire. This information gives load and speed ratings. Replacement tires should have the same or better ratings. For more information go to http://www.nhtsa.gov/Vehicle+Safety/Tires.

Checking the Wheel Lug Nuts
| Maintenance Service Interval | Maintenance Procedure |
|---|---|
| After the first hour |
|
| After the first 10 hours |
|
| Yearly |
|
Check and torque the wheel lug nuts to 108 to 122 N∙m (80 to 90 ft-lb).
Hydraulic System Maintenance
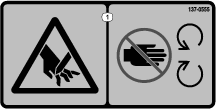
Hydraulic System Safety
-
Seek immediate medical attention if fluid is injected into skin. Injected fluid must be surgically removed within a few hours by a doctor.
-
Ensure that all hydraulic-fluid hoses and lines are in good condition and all hydraulic connections and fittings are tight before applying pressure to the hydraulic system.
-
Keep your body and hands away from pinhole leaks or nozzles that eject high-pressure hydraulic fluid.
-
Use cardboard or paper to find hydraulic leaks.
-
Safely relieve all pressure in the hydraulic system before performing any work on the hydraulic system.
Hydraulic Fluid Specifications
Hydraulic tank capacity: 30 L (8 US gallons)
Hydraulic fluid type: Toro All Season Hydraulic Fluid
Note: Many hydraulic fluids are almost colorless, making it difficult to spot leaks. A red dye additive for the hydraulic system fluid is available in 20 ml (0.67 fl oz) bottles. One bottle is sufficient for 15 to 22 L (4 to 6 US gallons) of hydraulic fluid. Order Part No. 44-2500 from your Authorized Service Dealer.
Checking the Hydraulic-Fluid Level
| Maintenance Service Interval | Maintenance Procedure |
|---|---|
| Before each use or daily |
|
Note: The best time to check the hydraulic-fluid level is when the machine is cool, before you start it for the day.
-
Park the machine on level ground, adjust the jack stand to ensure that the machine is level, and fully retract the splitting wedge.
-
Shut off the engine. Allow the machine to cool completely.
-
Lower the rail to the horizontal position; refer to Lowering the Rail to the Horizontal Position
-
Clean around the breather cap (Figure 33).
-
Remove the breather cap (Figure 33).
-
Wipe the dipstick off and thread the breather cap into the reservoir.
-
Remove the dipstick and verify that the fluid is at the upper notch (Figure 33). Install the breather cap.
-
If the fluid level is low, remove the filler plug and slowly add hydraulic fluid into the reservoir to raise the level to the upper notch on the dipstick (Figure 34).
-
Install the filler plug.
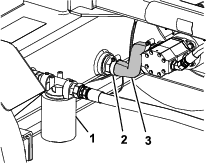
Replacing the Hydraulic Filter
| Maintenance Service Interval | Maintenance Procedure |
|---|---|
| Every 100 hours |
|
-
Park the machine on level ground, adjust the jack stand to ensure that the machine is level, fully retract the splitting wedge, and shut off the engine.
-
Place a drain pan under the filter and replace the filter (Figure 35).
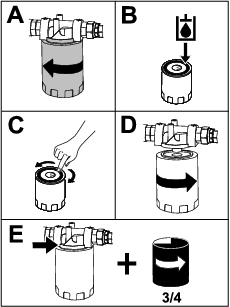
-
Clean up any spilled fluid.
Replacing the Hydraulic Fluid
| Maintenance Service Interval | Maintenance Procedure |
|---|---|
| Every 100 hours |
|
-
Park the machine on level ground, adjust the jack stand to ensure that the machine is level, fully retract the splitting wedge, and shut off the engine. Allow the machine to cool completely.
-
Place a drain pan under the suction hose connected to the reservoir tank (Figure 36).
-
Crank the handle of the jack lift to lower the front of the machine.
-
Disconnect the suction hose and allow fluid to drain into the drain pan.
-
Install the suction hose and secure it with the hose clamp.
-
Crank the handle of the jack lift to raise the machine so that it is level.
-
Remove the filler plug and fill the reservoir with hydraulic fluid as specified in Hydraulic Fluid Specifications.
Note: The fluid level should be at the upper notch on the dipstick on the breather cap (Figure 33)