Installation
Preparing the Machine
-
Park the machine on a level surface.
-
Lower the cutting units.
-
Engage the parking brake.
-
Shut off the machine and remove the key.
-
Disconnect the main-power connectors; refer to the Operator’s Manual of the machine.
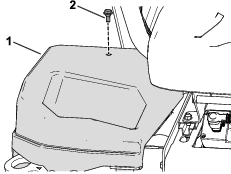
Removing the Right Side Cover
Remove the right side cover from the machine (Figure 1).
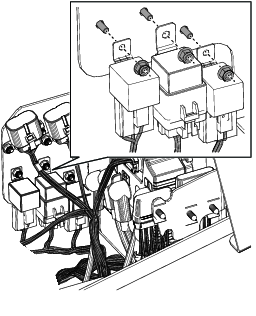
Removing the Relays
Remove the relays in Figure 2 by removing the three bolts and nuts. Retain the bolts and nuts for later installation.
Note: Mark the relays as you remove them so they can easily be installed later.
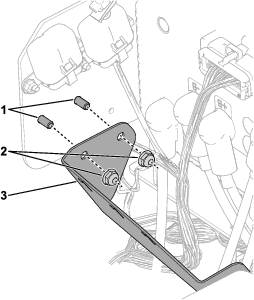
Installing the Relay Bracket
Parts needed for this procedure:
| Relay bracket | 1 |
| Bolt (1/4 x 1/2 inch) | 2 |
| Locknut (1/4 inch) | 2 |
-
Using two bolts (1/4 x 1/2 inch) and two locknuts (1/4 inch) secure the relay bracket to the previous relay mounting holes as shown in Figure 3.
-
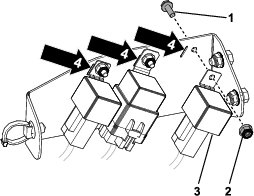
Install the three relays removed inRemoving the Relays to the relay bracket using the retained hardware (Figure 4).
Note: Use the slots in the relay bracket to orient the relays (4 in Figure 4).
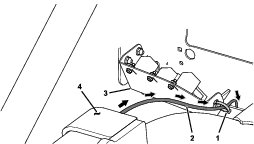
Routing the Steering Harness around the Relay Bracket
Parts needed for this procedure:
| Push-in cable tie | 1 |
Route the harness from the steering column to the side of the relay bracket and secure it using the cable tie (Figure 5).
The steering harness must be routed around the relay bracket.
Completing the Installation
-
Install the right side cover; refer to Figure 1.
-
Connect the main-power connectors; refer to the Operator’s Manual of the machine.