Maintenance
Recommended Maintenance Schedule(s)
| Maintenance Service Interval | Maintenance Procedure |
|---|---|
| Before each use or daily |
|
| After each battery drain cycle |
|
| Yearly or before storage |
|
Checking the Oil Level and Adding Bar and Chain Oil
| Maintenance Service Interval | Maintenance Procedure |
|---|---|
| Before each use or daily |
|
| After each battery drain cycle |
|
Important: Use only bar and chain oil (sold separately).
-
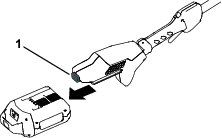
Shut off the pole saw and remove the battery pack; refer to Removing the Battery Pack.
-
Check the oil level in the window. If the oil does not fill the window, add bar and chain oil as needed (Figure 16).

-
Place the pole saw on a flat surface with the oil cap facing up.
-
Clean the area around the oil cap (Figure 16).
Note: Ensure that you do not allow debris/wood chips to enter the oil tank.
-
Remove the cap, and pour bar and chain oil into the pole saw until the oil fills the tank (Figure 16).
Important: Do not fill the pole saw higher than the bottom of the fill neck.
-
Clean up any spilled oil and secure the oil cap.
-
Ensure that oil is flowing to the chain; refer to Checking the Flow of Bar and Chain Oil.
Checking the Flow of Bar and Chain Oil
| Maintenance Service Interval | Maintenance Procedure |
|---|---|
| Before each use or daily |
|
-
Prepare to use the pole saw; refer to Before Using the Pole Saw.
-
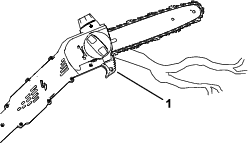
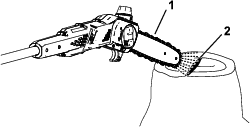
To ensure that oil is flowing to the chain, point the nose of the pole saw a few inches from a surface (e.g. paper, cardboard, a stump) and run the pole saw; you should be able to see a light spray of oil on the surface (Figure 17).
-
If oil is not flowing, ensure that there is oil in the tank and that the area under the side cover is clean; refer to Checking the Oil Level and Adding Bar and Chain Oil and Servicing the Guide Bar, Chain, and Drive Sprocket.
Adjusting the Chain Tension
| Maintenance Service Interval | Maintenance Procedure |
|---|---|
| Before each use or daily |
|
| After each battery drain cycle |
|
Ensure that the chain is properly tensioned.
A loose chain shortens the life of the drive sprocket and the guide bar and may cause the chain to fall off.
An overtightened chain overheats the guide bar and chain, causing rapid wear, and may burn out the motor or break the chain.
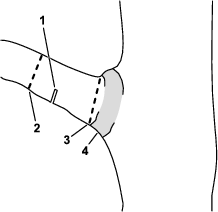
The chain tension is correct when you are able to use a gloved hand to pull the chain smoothly around the guide bar. The chain should remain in contact with the bottom edge of the guide bar.
Also, check the chain tension of a new chain after a few cuts; a new chain usually stretches and requires adjustment after a few cuts.
Danger
Contact with the pole saw teeth can cause serious personal injury.
-
Remove the battery pack before adjusting or maintaining the pole saw.
-
Always wear gloves when adjusting or maintaining the pole saw.
-
Place the pole saw on a level surface and remove the battery pack; refer to Removing the Battery Pack.
-
Allow the saw chain to cool.
Important: Do not tension a hot chain; it may contract as it cools, resulting in an overtightened chain.
-
Inspect the guide bar for bends or damage, replace if necessary.
-
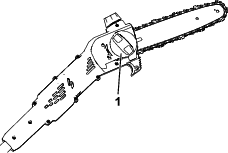
Turn the bar cover knob counterclockwise to loosen the bar cover, but do not remove it (Figure 18).
-
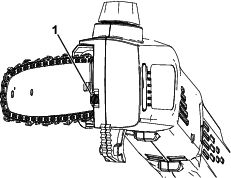
Adjust the chain tension using the chain tensioning screw (Figure 19), and then secure the side cover to the pole saw by turning the bar cover knob clockwise before checking the tension (Figure 18).
-
To tighten the chain, turn the chain tensioning screw clockwise.
-
To loosen the chain, turn the chain tensioning screw counterclockwise.
Adjust the chain tension until the chain touches the bottom edge of the guide bar, then pull the chain away from the bottom edge of the guide bar; a properly adjusted chain can only be pulled 3.2 to 6.4 mm (1/8 to 1/4 inch) away from the guide bar, and snaps back on release.
Note: While adjusting the chain tension, lift up the tip of the guide bar with a gloved hand to ensure the guide bar does not sag and affect chain tension.
-
-
Use a gloved hand to pull the chain around the guide bar. A properly tensioned chain should move smoothly and remain in contact with the bottom edge of the guide bar.
-
If the chain is not properly tensioned, repeat steps 4 through 7.
Servicing the Guide Bar, Chain, and Drive Sprocket
| Maintenance Service Interval | Maintenance Procedure |
|---|---|
| Before each use or daily |
|
| Yearly or before storage |
|
Danger
Contact with the pole saw teeth can cause serious personal injury.
-
Remove the battery pack before adjusting or maintaining the pole saw.
-
Always wear gloves when adjusting or maintaining the pole saw.
-
Place the pole saw on a flat surface and remove the battery pack; refer to Removing the Battery Pack.
-
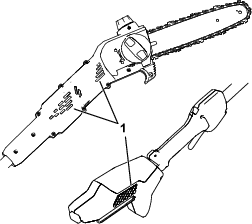
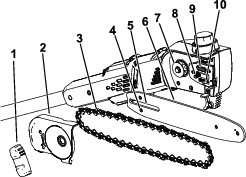
Remove the side cover; turn the bar cover knob counterclockwise until the knob is removed and then remove the side cover (Figure 20).
-
Loosen the chain by turning the chain-tightening screw counterclockwise (Figure 19).
-
Separate the chain from the guide bar and set them aside.
-
Clean any debris from the area under the side cover.
-
Inspect the drive sprocket; if it is excessively worn or damaged, replace it; contact your authorized service dealer.
-
Check the oil outlet (Figure 20) for debris and clean the area if necessary.
-
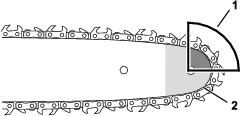
Clean the guide bar and chain; use a wire or a small flat-head screwdriver to remove dirt and debris from the groove along the edge of the guide bar, starting from the sprocket on the front end and moving rearward.
Ensure that the oil channel in the bar that aligns with the oil outlet on the pole saw is clean so that oil can flow freely to the chain (Figure 21).

-
Inspect the guide bar and chain; if the bar is bent, the grooves are damaged, or if the sprocket on the front end does not rotate freely, replace the guide bar; if the chain is excessively worn or damaged, replace it.
-
Install the guide bar and chain; refer to Installing the Guide Bar and Chain.
-
Ensure that oil is flowing to the chain; refer to Checking the Flow of Bar and Chain Oil.
Installing the Guide Bar and Chain
Danger
Contact with the pole saw teeth can cause serious personal injury.
-
Remove the battery pack before adjusting or maintaining the pole saw.
-
Always wear gloves when adjusting or maintaining the pole saw.
-
If the side cover is installed to the machine, remove it; refer to Servicing the Guide Bar, Chain, and Drive Sprocket.
-
Place the chain around the sprocket on the front end of the guide bar, with the cutting edge of the chain teeth on the top of the bar facing forward as shown in the diagram beneath the side cover of the pole saw.
-
Feed the chain around the guide bar and align the chain into the groove of the guide bar.
Note: If you are installing a new chain, flip the guide bar to avoid uneven wear.
-
Position the open loop of the chain (not on the guide bar) around the drive sprocket on the pole saw and install the guide bar and attached chain onto the pole saw.
Important: Ensure that the chain adjusting stud is inserted into the chain adjusting stud slot on the guide bar (Figure 20). You may need to rotate the chain-tensioning screw to fit the stud into the hole in the guide bar.
-
Install the side cover, but do not fully tighten the side cover knob.
-
Adjust the chain tension; refer to Adjusting the Chain Tension.
Sharpening the Chain
| Maintenance Service Interval | Maintenance Procedure |
|---|---|
| Before each use or daily |
|
| Yearly or before storage |
|
A sharp chain ensures better cutting performance and longer battery life.
The chain needs to be sharpened or replaced if you must force it onto the wood, or if it produces sawdust instead of full wood chips.
Contact an Authorized Service Dealer to have the chain sharpened or replaced.
Service
Should the pole saw need service, take the tool to your Authorized Service Dealer.
