Warning
CALIFORNIA
Proposition 65 Warning
Use of this product may cause exposure to chemicals known to the State of California to cause cancer, birth defects, or other reproductive harm.
Safety
Safety and Instructional Decals
 |
Safety decals and instructions are easily visible to the operator and are located near any area of potential danger. Replace any decal that is damaged or missing. |


Setup
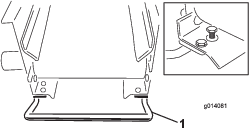
Assembling the Option Caddy
Parts needed for this procedure:
| Option caddy | 1 |
| Handle | 1 |
| Pin | 1 |
Note: Remove all wooden shipping blocks and banding before proceeding with installation.
-
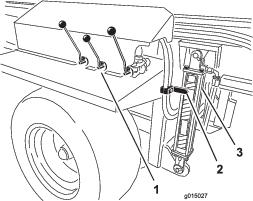
Install the handle into the option caddy and secure it with the pin (Figure 1).

-
Check that the tire pressure on all tires is 30 psi (206 kPa) maximum.
Assembling the Cross Conveyor
Parts needed for this procedure:
| Handle | 2 |
| Bolt (1/4 x 3/4 inch) | 8 |
| Flange lock nut (1/4 inch) | 8 |
Attach the handles to the cross conveyor, below the side rails, using (4) 1/4 x 3/4 inch bolts and flange lock nuts (Figure 2).
Using the Option Caddy
The option caddy is designed for one person to lift, transport, and mount the cross conveyor/swivel onto the MH-400.
Warning
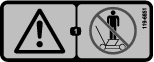
The option caddy has a maximum carrying load of 1500 lb (680 kg). Do not carry people on it.
-
Lift the cross conveyor/swivel onto the option caddy.
-
Transport the option to the rear of the MH-400 and raise it into position for mounting.
Caution
Do not leave loads unattended or in the raised position.
-
Install the option into the quick-attach brackets on the rear of the MH-400 (See the Installing the Cross Conveyor/Swivel).
-
Lower the caddy and roll the it back until it is completely free from the option.
Note: Do not maneuver the caddy in muddy or soft terrain, otherwise it will be difficult to move.
Installing the Cross Conveyor/Swivel
The cross conveyor spreads material to either side of the MH-400 while the swivel kit allows the cross conveyor to swivel freely in a 270 degree arc, or to be locked into one of five fixed positions, 45 degrees a part.
Note: The MH-400 comes equipped with a pair of quick attach mounting clamps. Use these clamps to mount the cross conveyor/swivel to the MH-400.
-
Position the cross conveyor/swivel so the swivel kits two mounting brackets face toward the rear (away from the MH-400).
-
Ensure that the cross conveyor/swivel is centered between the mounting brackets and that the motor extends out the same side as the control handles on the MH-400.
-
Remove the safety latch clips from the clamp handles (Figure 3).
-
Lift the safety latch, then lift the option attachment clamp handles, and release the lock rings from the lock pins (Figure 3).
-
Slide the rear option attachment clamp assembly out of the quick-attach slots (Figure 3).
-
With assistance, insert the front edge of the cross conveyor/swivel up and under the rear of the MH-400 into the front clamps on the brackets (Figure 3).
-
While supporting the cross conveyor/swivel, slide the rear option attachment clamp assembly back into the slots in the brackets, and over the rear edge (Figure 3).
-
Ensure that the cross conveyor/swivel is centered between the brackets. Then re-install the lock rings over the lock pins and push down on the clamp handles
Note: If the clamp assembly is too loose and the cross conveyor/swivel slides within the clamps, turn the lock rings into the clamps a few turns until the cross conveyor/swivel is secure.
Important: Do not over-tighten the clamps. This may bend the edges of the cross conveyor/swivel.
-
Reinstall the safety latch clips to the clamp handles (Figure 3).
Caution
Ensure that you reinstall the safety latch clips into the clamps. Otherwise, the clamps may open during operation.
Warning
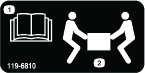
The options are heavy. Use an assistant to help lift the cross conveyor/swivel.

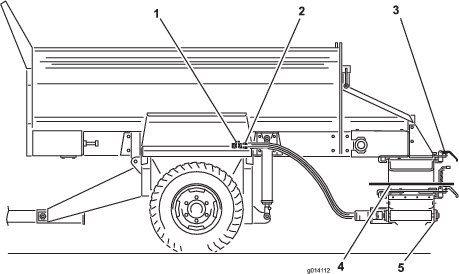
Connecting the Hydraulic Hoses
Warning
Ensure that the tow vehicle is turned off before making the hydraulic connections, to prevent the cross conveyor/swivel from accidentally turning on.
Connect the hydraulic hoses to the option control valve on the MH-400 as follows (Figure 4):
-
Pull back (or push forward) on the outer sleeve of the female connector and insert the male connector.
-
Hold the male connector firmly in place and release the outer sleeve of the female connector.
-
Ensure that the connectors are pushed all the way in and are securely locked in place. Ensure that the hydraulic hoses run horizontally
-
With the tow vehicle hydraulics operating, pull back on the option control lever on the SH models or start the option using the option start button on the wireless controller on the EH models, and ensure that the cross conveyor/swivel is operating properly.
Warning
-
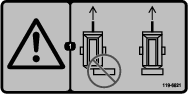
Make sure all hydraulic line connectors are tight, and all hydraulic hoses and lines are in good condition before applying pressure to the system.
-
Keep body and hands away from pin hole leaks in hydraulic lines that eject high pressure hydraulic fluid. Use cardboard or paper to find hydraulic leaks. Hydraulic fluid escaping under pressure can penetrate skin and cause injury. Fluid accidentally injected into the skin must be surgically removed within a few hours by a doctor familiar with this form of injury or gangrene may result.
Operation
Operating the Cross Conveyor
Extending and Retracting the Cross Conveyor
Caution
Always return the cross conveyor to the center position when traveling, otherwise the cross conveyor can hit people or objects, and can also be damaged.
-
Remove the safety pins from both option attachment clamps on the swivel kit.
-
Loosen the option attachment clamp brackets
-
Slide the conveyor to the center or side.
-
Re-tighten the clamp brackets.
-
Re-install the safety pins.
-
On SH models adjust the speed of the cross conveyor with the hydraulic lever on the right. On EH models adjust the speed of the cross conveyer with the wireless remote.
Note: Always lower the hopper before adjusting the cross conveyor. Otherwise, the cross conveyor will rest at an angle.

Spreading Material from the Cross Conveyor
-
Turn off the tow vehicle.
-
On SH models using the control levers, turn on the option and the conveyor belt (unload position).
-
Open the adjustable section of the rear gate to allow for the desired flow rate. You may have to experiment until you get the desired flow and spread depth. Other variables include ground speed and the type of material
-
Turn on the tow vehicle hydraulics.
-
On SH models, turn off the tow vehicle hydraulics to stop material movement or turn off the on/off pendant switch.
Note: For SH models the on/off pendant switch stops the floor conveyor belt, not the cross conveyor.
-
On EH models, operate the option and the conveyer belt with the wireless remote.
-
When finishing using the cross conveyor, always return it to the center position.
Operating the Swivel Kit
To direct the flow of material from the cross conveyor in any direction, pull up the spring-loaded locking pin on the swivel kit into the unlock or open position. This allows you to manually move the cross conveyor freely from side to side on the swivel bearing (Figure 5).
To keep the cross conveyor in a fixed position, release the spring-loaded locking pin into one of the five locking positions on the swivel kit.
Note: When traveling over uneven terrain, raise the machine to the maximum safe traveling range. This provides more ground clearance for the cross conveyor/swivel.