


Maintenance
After each use of the trimmer, complete the following:
-
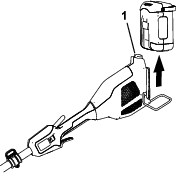
Remove the battery pack from the trimmer.
-
Wipe the trimmer clean with a damp cloth. Do not hose the trimmer down or submerge it in water.
Caution
The line cutoff blade on the deflector is sharp and can cut you.
Do not use your hands to clean the deflector shield and blade.
-
Wipe or scrape clean the cutting head area any time there is an accumulation of debris.
-
Inspect the machine, check and tighten all fasteners. If any part is damaged or lost, repair or replace it.
-
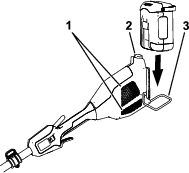
Brush debris away from air intake vents and exhaust on motor housing to prevent the motor from overheating.
Replacing the Line
Use only 2.4 mm (0.095 inch) diameter monofilament line.
-
Remove the battery pack.
-
Remove any existing line on the spool by repetitively pressing the bump head while pulling the line out equally from both sides of the bump head.
-
Using 2.4 mm (0.095 inch) line, cut a piece of line that is no longer than 7.3 m (24 ft).
Important: Do not overload the spool.
Important: Do not use any other gauge or type of line, as this could damage the trimmer.
-
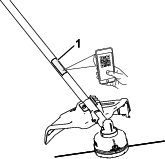
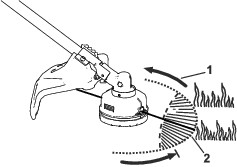
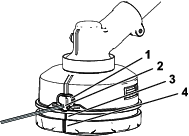
Press and turn the bottom of the trimmer head in the direction shown by the arrows (clockwise) on the bottom of the bump head until the bottom green marks align with the green marks beneath the eyelets (Figure 14).
-
Insert 1 end of the line straight into the eyelet and push the line through until it comes out through the eyelet on the other side.
Important: Do not disassemble the trimmer head.
-
Pull the line through the eyelets until there is an equal length of line on each side of the trimmer head.
-
Hold the string trimmer in place with one hand. With your other hand, turn the bottom of the trimmer head in the direction shown by the arrows (clockwise) on the bottom of the bump head to wind the line; leave about 152 mm (6 inches) extending beyond the eyelet on each side.
Replacing the Trimmer Head
-
Remove the battery pack from the trimmer.
-
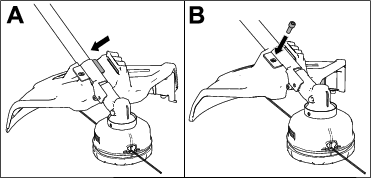
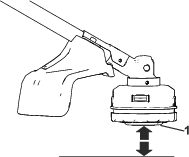
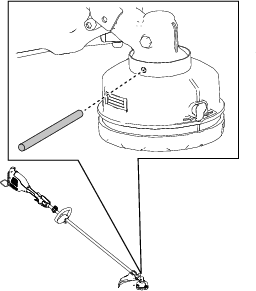
Align the hole in the cup plate with the hole in the trimmer gearcase (Figure 15).
-
Insert the included metal rod through the cup plate and into the hole in the trimmer gearcase to secure the trimmer head (Figure 15).
-
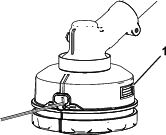
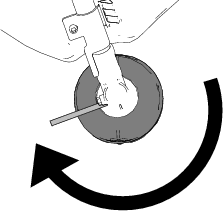
With the metal rod securing the trimmer head, rotate the trimmer head clockwise to remove it from the threaded gearcase post (Figure 16).
-
To install the new trimmer head, rotate it counterclockwise onto the gearcase post while securing the cup plate using the metal rod.