


Maintenance
Recommended Maintenance Schedule(s)
| Maintenance Service Interval | Maintenance Procedure |
|---|---|
| After the first 2 hours |
|
| Yearly |
|
| Yearly or before storage |
|
Preparing for Maintenance
| Maintenance Service Interval | Maintenance Procedure |
|---|---|
| Yearly |
|
-
Move the machine to a level surface.
-
Stop the machine, remove the electric-start key, wait for all movement to stop, and remove the battery pack(s) from the machine before adjusting, servicing, cleaning, or storing the machine.
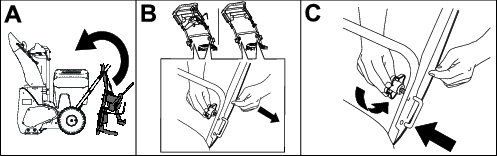
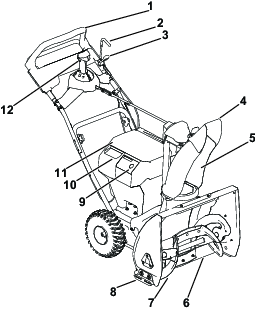
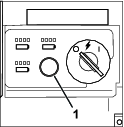
Checking and Adjusting the Skids
| Maintenance Service Interval | Maintenance Procedure |
|---|---|
| Yearly |
|
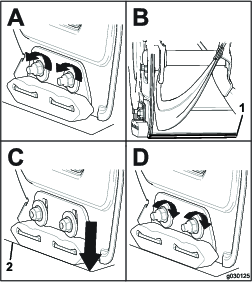
Check the skids to ensure that the auger does not contact the paved surface. Adjust the skids as needed to compensate for wear (Figure 19).
-
Loosen the skid bolts.
-
Slide a 5 mm (3/16 inch) board underneath the scraper.
Note: Using a thinner board results in a more aggressive scraper; using a thicker board results in a less aggressive scraper.
-
Lower the skids to the ground.
Note: Ensure that the skids are flat on the ground.
-
Tighten the skid bolts.
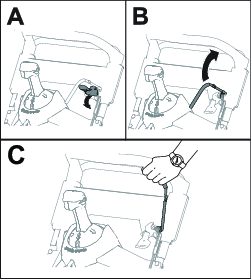
Adjusting the Auger Cable
| Maintenance Service Interval | Maintenance Procedure |
|---|---|
| After the first 2 hours |
|
| Yearly |
|
If the drive belt slips or squeals under a heavy load, adjust the auger cable.
-
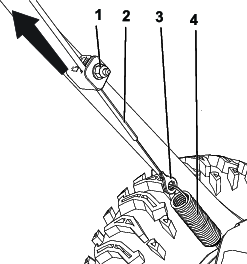
Loosen the nut on the lower cable clamp, but do not remove it (Figure 20).
-
Pull the cable up to remove some slack (Figure 20).
Important: Do not remove all the slack from the cable. Removing all the slack from the cable prevents the auger from stopping properly.
-
Hold the cable in place and tighten the nut (Figure 20).
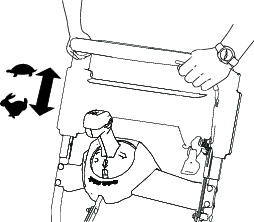
Adjusting the Transmission Cable
| Maintenance Service Interval | Maintenance Procedure |
|---|---|
| After the first 2 hours |
|
| Yearly |
|
If the wheels easily stall out, or if the wheels drive without engaging the self-propel handle, adjust the transmission cable.
-
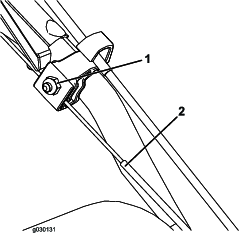
Loosen the nut on the upper cable clamp, but do not remove it (Figure 21).
-
Pull the cable down to remove most of the slack in the cable (Figure 21).
Important: Do not remove all the slack from the cable. Removing all the slack from the cable may cause the wheels to engage without engaging the self-propel handle.
-
Tighten the nut (Figure 21).
Replacing the Drive Belts
If the auger drive belt or the traction-drive belt becomes worn, oil-soaked, or otherwise damaged, have an Authorized Service Dealer replace the belt.
