Installation
Note: Determine the left and right sides of the machine from the normal operating position.
Preparing the Machine
-
Park the machine on a level surface.
-
Move the motion-control levers to the NEUTRAL-LOCK position.
-
Engage the parking brake.
-
Shut off the engine, remove the key, and wait for all movement to stop before you leave the operator’s position.
-
Allow the machine to cool before adjusting, servicing, cleaning, or storing it.
Installing the Kit
Parts needed for this procedure:
| Support bracket | 1 |
| Tie clip | 6 |
| Plastic plug | 3 |
| Self-tapping screw (1/4 x 5/8 inch) | 2 |
-
Raise the seat to the service position.
-
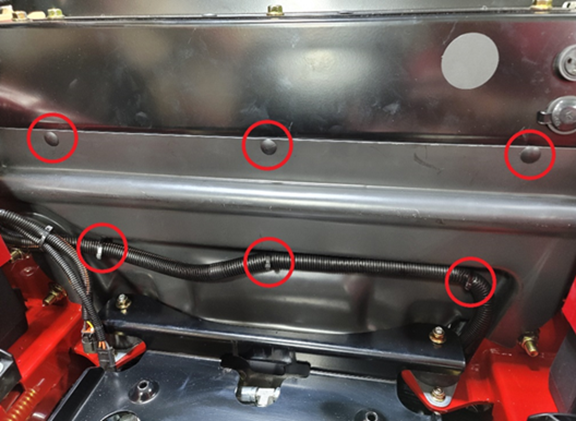
Remove and discard the 3 tie clips securing the wire harness (Figure 1).
-
Remove and discard the 3 plastic plugs securing the heat-deflector panel (Figure 1).
-
Remove the heat-deflector panel.
-
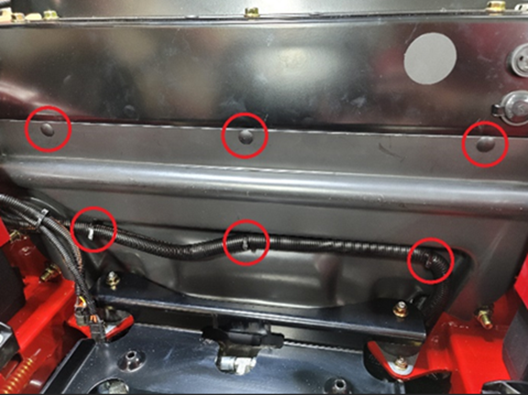
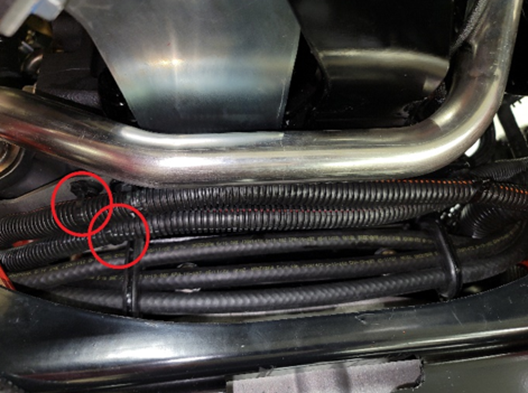
Remove and discard the 2 tie clips securing the wire harness (Figure 2).
-
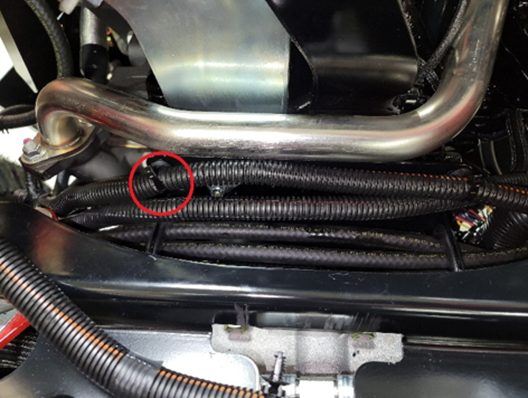
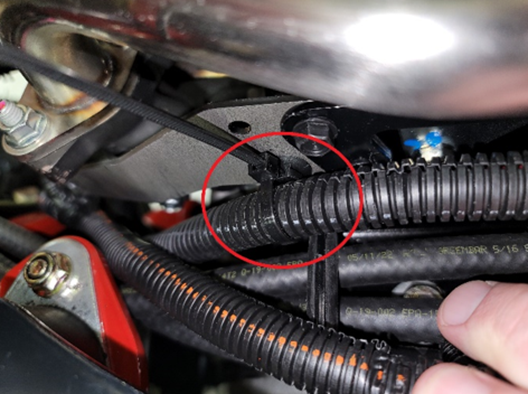
Move the wire harness away from the bracket to access the 2 clip-mounting holes (Figure 3).
-
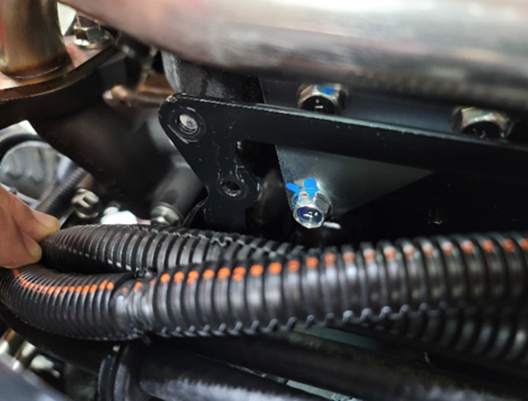
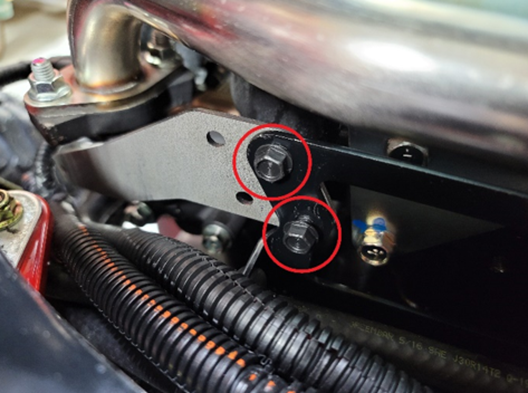
Secure the new support bracket using the 2 self-tapping screws (1/4 x 5/8 inch) as shown in Figure 4.
-
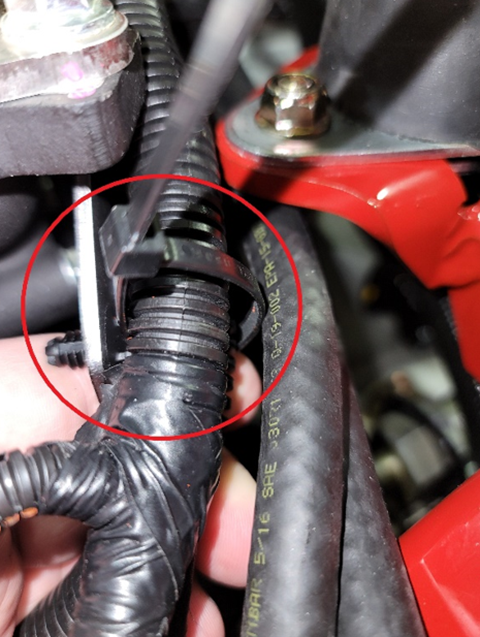
Secure the wire harness to the support bracket using 2 tie clips (Figure 5).
-
Ensure that both wire harnesses are secure, then cut the excess from the tie clips (Figure 6).
-
Secure both wire harnesses to the long end of the bracket using 1 tie clip, then cut the excess from the tie clip (Figure 7).
-
Secure the heat-deflector panel using 3 plastic plugs (Figure 8).
-
Secure the wire harness to the heat-deflector panel using 3 tie clips (Figure 8).