Seat Suspension Kit
60in TITAN® MAX Riding Mower
Installation Instructions
Preparing the Machine
-
Park the machine on a level surface.
-
Move the motion-control levers to the Neutral-lock position.
-
Engage the parking brake.
-
Shut off the engine and remove the key.
-
Wait for the machine to cool.
Removing the Seat Assembly
Note: Retain all removed parts.
-
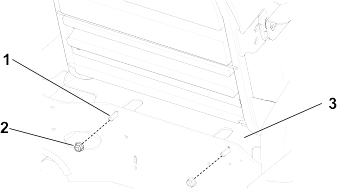
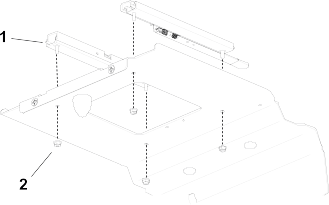
Remove the fasteners securing the seat plate to the machine.
G421136
-
Carriage bolt (2)
-
Nut (2)
-
Seat plate
-
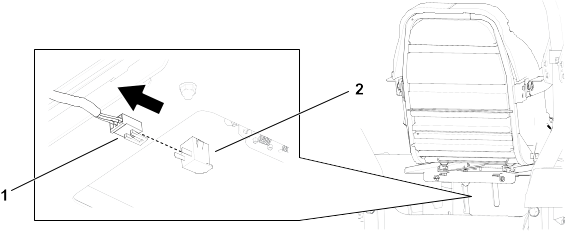
Lift the seat assembly and unplug the wire harness from the seat switch.
G421137
-
Wire harness
-
Seat switch
-
Remove the seat assembly from the machine.
-
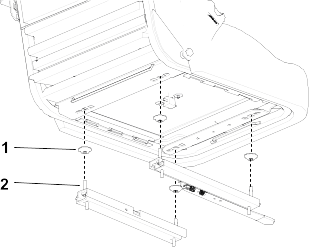
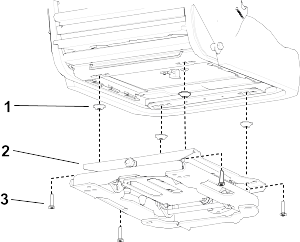
Remove the nuts securing the seat rails to the seat plate.
-
Remove the rails from the seat.
G421283
- Curved washer (4)
- Screw (4)
Installing the Seat Suspension
Parts Required
|
1
|
Seat suspension assembly
|
|
2
|
Long spacer
|
|
2
|
Short spacer
|
|
4
|
Nut
|
|
4
|
Bolt
|
Note: The suspension assembly may come with additional hardware. Discard any unused parts after installation.
-
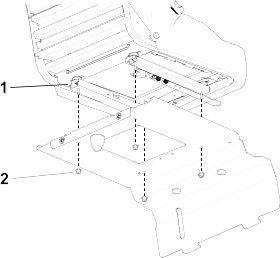
Install the rails to the seat plate using the existing nuts.
G421140
- Rail (2)
- Existing nut (4)
-
Install the suspension assembly to the seat using the screws from the rails.
G421753
- Curved washer (4)
- Suspension assembly
- Rail screw (4)
-
Plug the wire harness into the seat switch from the right side of the seat.
G421141
- Wire harness
- Seat switch
-
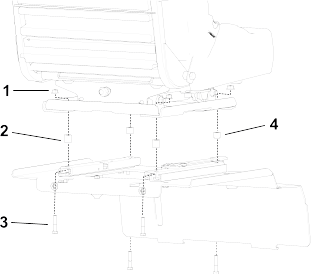
Attach the suspension assembly to the rails using the kit fasteners.
Note: Use the long spacers for the rear of the seat and use the short spacers for the front.
G421754
- Nut (4)
- Long (rear) spacer (2)
- Bolt (4)
- Short (front) spacer (2)
-
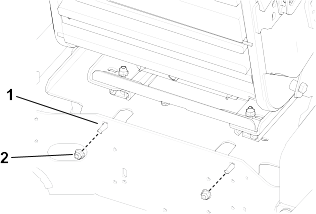
Place the assembly on the machine and secure the seat plate to the frame using the existing fasteners.
G421139
- Existing bolt (2)
- Existing nut (2)
-
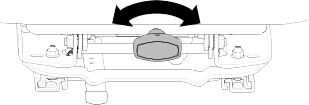
Turn the knob on the seat to the desired suspension before driving the machine.