|
|
|
|
 |
Danger | |
|
Warning | |
 , install the nuts and bolts into the mower deck.
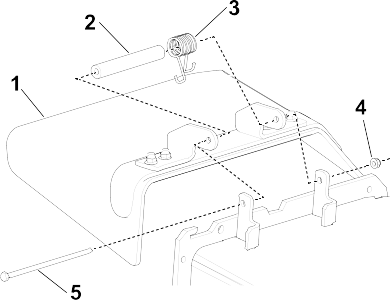
 , bolt
  , spring
  , and spacer
  holding the grass deflector to the pivot brackets.
 |
Warning | |
 , use the discharge plate as a template and mark the location of the holes..
|
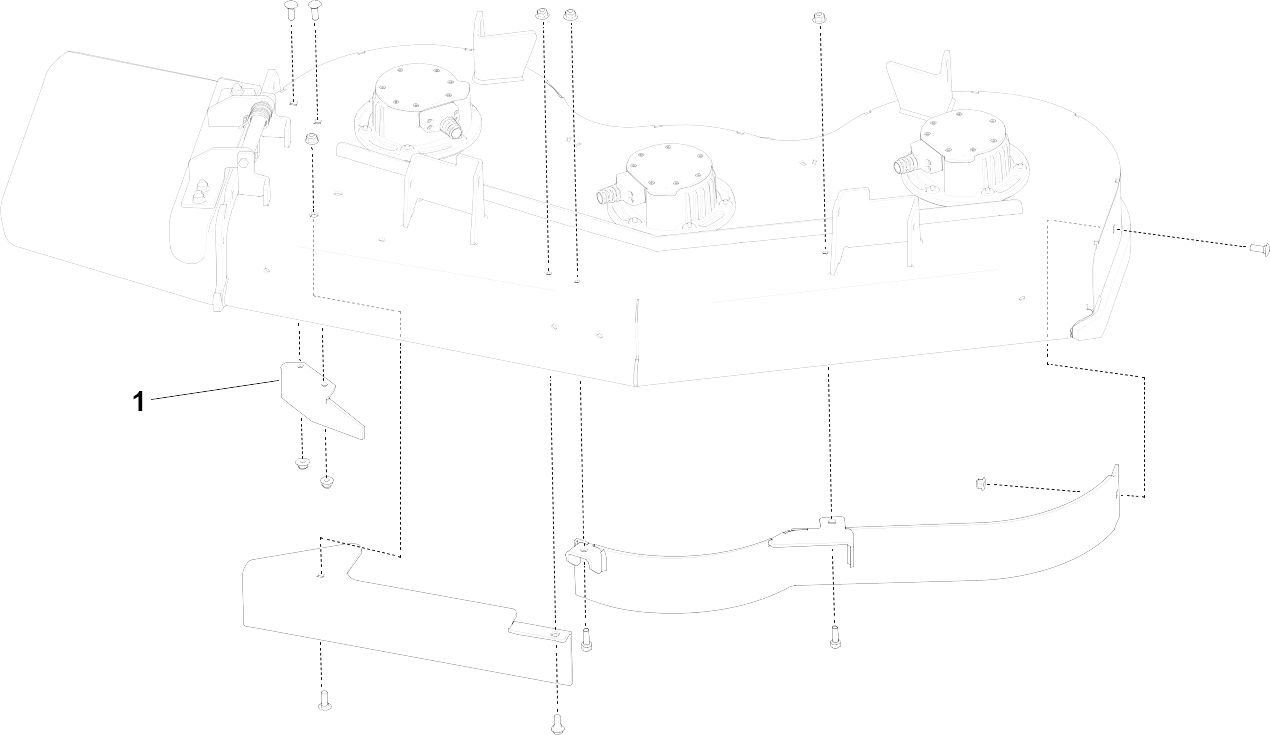
1
|
Discharge plate
|
|
2
|
Carriage bolt (3/8 x 1-1/4 inches)
|
|
1
|
Carriage bolt (5/16 x 7/8 inch)
|
|
2
|
Flange nut (small flange) (3/8 inch)
|
|
1
|
Flange nut (5/16 inch)
|
 to the outside of the mounting bracket with 2 carriage bolts (3/8 x 1-1/4 inches) and 2 flange nuts (small flange) (3/8 inch) . and 1 flange nut (5/16 inch) (small flange)
  . is positioned inside the mower deck.
|
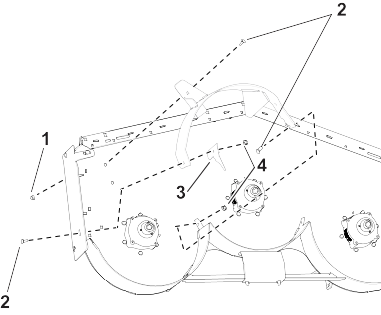
1
|
Left baffle
|
|
1
|
Center baffle
|
|
1
|
Right baffle
|
|
7
|
Carriage bolt (3/8 x 1 inch)
|
|
2
|
Flange nut (large flange) (3/8 inch)
|
|
2
|
Bolt (3/8 x 1 inch)
|
|
7
|
Flange nut (small flange) (3/8 inch)
|
|
1
|
Side plate (Grandstand decks only)
|
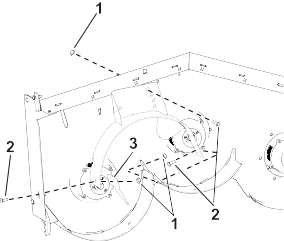 and the right baffle with 2 carriage bolts (3/8 x 1 inch) and 2 flange nuts (small flange) (3/8 inch) .
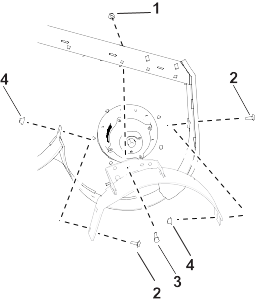 and 1 flange nut (small flange) (3/8 inch) . and 2 flange nuts (large flange) (3/8 inch) .
 and 1 flange nut (small flange) (3/8 inch) . and 1 flange nut (small flange) (3/8 inch).
|
1
|
Left baffle
|
|
1
|
Center baffle
|
|
1
|
Right baffle
|
|
7
|
Carriage bolt (3/8 x 1 inch)
|
|
1
|
Flange nut (large flange) (3/8 inch)
|
|
2
|
Bolt (3/8 x 1 inch)
|
|
10
|
Flange nut (small flange) (3/8 inch)
|
|
1
|
Side plate (Grandstand decks only)
|
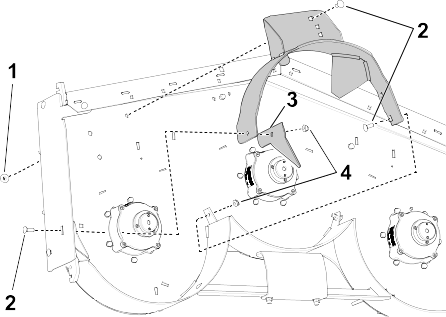 and the right baffle with 1 carriage bolt (3/8 x 1 inch) and a flange nut (small flange) (3/8 inch) . .
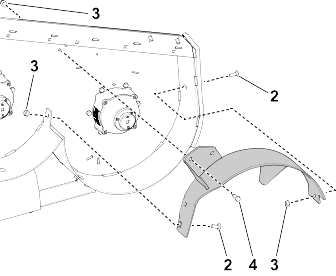 and 1 flange nut (small flange) (3/8 inch) . and 1 flange nut (small flange) (3/8 inch).
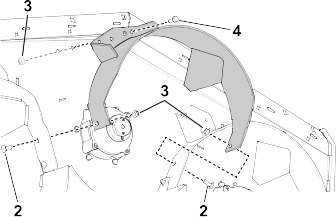 and 1 flange nut (small flange) (3/8 inch) . and 1 flange nut (small flange) (3/8 inch).
|
1
|
Left baffle
|
|
1
|
Center baffle
|
|
1
|
Right baffle
|
|
7
|
Carriage bolt (3/8 x 1 inch)
|
|
1
|
Flange nut (large flange) (3/8 inch)
|
|
2
|
Bolt (3/8 x 1 inch)
|
|
8
|
Flange nut (small flange) (3/8 inch)
|
|
1
|
Side plate (Grandstand decks only)
|
 and the sides of the right baffle with 2 carriage bolts (3/8 x 1 inch) and 2 flange nuts (small flange) (3/8 inch) . .
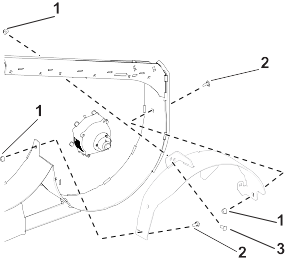 and 1 flange nut (small flange) (3/8 inch) . and 2 flange nuts (small flange) (3/8 inch).
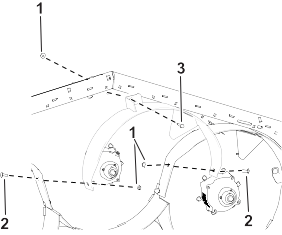 and 1 flange nut (small flange) (3/8 inch) . and 1 flange nut (small flange) (3/8 inch).
|
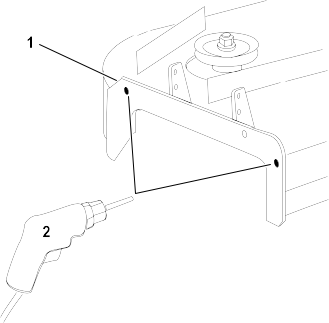
1
|
Trailing shield
|
|
2
|
Shoulder bolt
|
|
Warning | |
holes to the holes in the mower and install the shield using 2 shoulder bolts .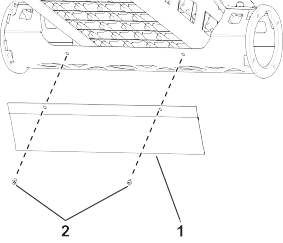
|
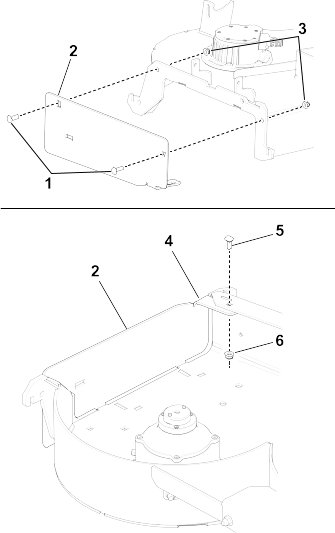
3
|
Recycler blade (sold separately)
|