Installation
Preparing the Machine
-
Park the machine on a level surface.
-
Disengage the drives and the power take-off.
-
Shut off the machine and remove the key.
-
Wait for all moving parts to stop.
-
Turn the battery-disconnect switch to the OFF position.
Drilling the Motor Controller Cover
Note: For installation assistance, contact an Authorized Service Dealer.
-
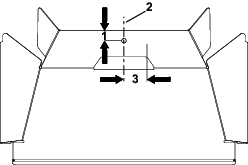
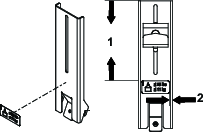
On upper portion of the motor controller cover, measure and mark the hole locations as shown below.
Warning
Using a drill without proper eye protection may allow debris to enter the eye, causing injury.
When drilling, always wear eye protection.
-
Use a drill bit (7/32 inch) to drill a hole through the marked hole location.
Note: When drilling, avoid pushing the drill bit too far beyond the cover.
-
Use compressed air to remove the shavings from drilling.
-
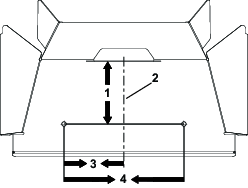
On the lower portion of the motor controller cover, measure and mark the 2 hole locations as shown below.
-
Use a drill bit (7/32 inch) to drill 2 holes through the marked hole locations.
Note: When drilling, avoid pushing the drill bit too far beyond the cover.
-
Use compressed air to remove the shavings from drilling.
Installing the Bucket Mount Kit
Parts needed for this procedure:
| Bucket-mount plate | 1 |
| Screw (1/4 x 1/2 inch) | 3 |
| Mount bracket | 1 |
| Top bracket | 1 |
| Carraige bolt (5/16 x 7/8 inch) | 1 |
| Handle knob | 1 |
| Maximum weight decal | 1 |
| Bucket (5 US gallons) | 1 |
-
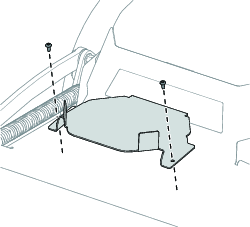
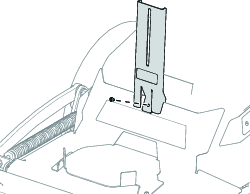
Install the bucket-mount plate onto the lower motor controller cover using the 2 screws (1/4 x 1/2 inch).
-
Install the decal on the mount bracket as shown below.
-
Install the mount bracket onto the upper motor controller cover using the screw (1/4 x 1/2 inch).
-
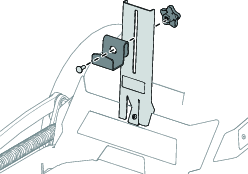
Loosely install the top bracket to the mount bracket using the carriage bolt (5/16 x 7/8 inch) and handle knob.
-
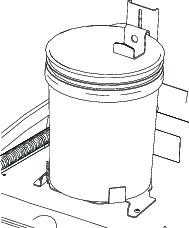
Place the bucket onto the bucket-mount plate and secure it with the top bracket. Tighten the handle knob.