Installation
Important: We recommend installing this kit when you perform your next oil change; refer to the Operator’s Manual. Performing the oil change at the end of the day allows the Loctite® 620 to cure overnight.
Preparing the Machine
-
Park the machine on a level surface.
-
Engage the parking brake.
-
Shut off the engine and remove the key.
-
Wait for the engine to cool completely.
-
Raise the cargo bed and secure it in the service position using the prop rod; refer to the Operator’s Manual.
Removing the Existing Dipstick Tube
-
Remove the dipstick from the tube.
Retain the dipstick.
-
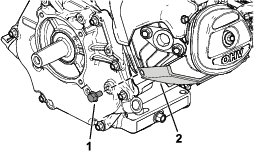
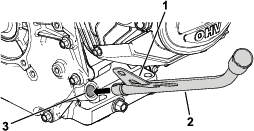
Remove the bolt securing the dipstick tube to the heat shield of the engine (Figure 1).
Retain the bolt.

-
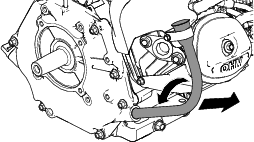
Rotate the dipstick tube to the left and remove it (Figure 2).
-
Install the previously removed bolt to the heat shield and torque the bolt to 10.7 to 11.3 N∙m (95 to 100 in-lb).
Installing the New Dipstick Tube
Parts needed for this procedure:
| Dipstick tube | 1 |
| Loctite® 620 (0.5 ml) | 1 |
Important: For best results, allow the Loctite® 620 to cure for 24 hours to develop the proper heat resistance.You can accelerate the curing time to 8 hours if the ambient temperatures are above 22°C (71.6°F).
-
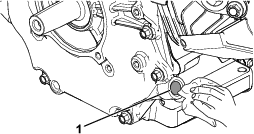
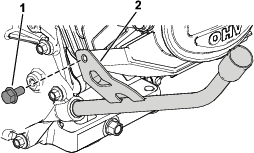
Remove the bolt from the engine-mounting surface (Figure 3).
Retain the bolt.
-
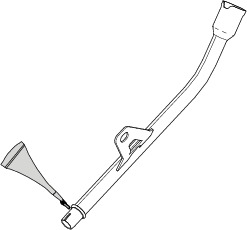
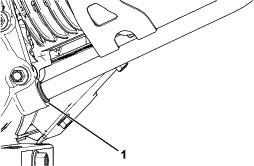
Thoroughly clean the dipstick tube opening where you will install the dipstick tube (Figure 4).
-
Apply the Loctite® 620 uniformly and evenly around the sealing surface of the dipstick tube (Figure 5).
-
Insert the dipstick tube at an angle into the tube opening (Figure 6).
-
Using a rubber mallet, tap the bracket (item 1) on the dipstick tube (Figure 6) to secure the tube into the engine.
Important: Striking anything but the bracket on the tube could damage it.
-
Ensure that the bottom of the dipstick tube is flush with the tube opening (Figure 7).
-
Rotate the dipstick tube so that it is parallel with the engine-mounting surface and secure it using the previously removed bolt (Figure 8).
-
Torque the bolt to 10.7 to 11.3 N∙m (95 to 100 in-lb).
-
Insert the dipstick into the dipstick tube.
-
Ensure that the Loctite® 620 cures properly.
-
Lower the cargo bed.