


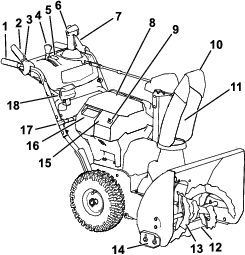


Maintenance
Recommended Maintenance Schedule(s)
| Maintenance Service Interval | Maintenance Procedure |
|---|---|
| After the first 2 hours |
|
| Yearly |
|
| Yearly or before storage |
|
Preparing for Maintenance
-
Move the machine to a level surface.
-
Stop the machine, remove the electric-start key, wait for all movement to stop, and remove the battery pack(s) from the machine before adjusting, servicing, cleaning, or storing the machine.
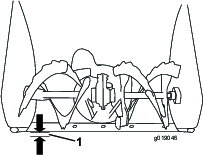
Checking and Adjusting the Skids and Scraper
| Maintenance Service Interval | Maintenance Procedure |
|---|---|
| Yearly |
|
Check the skids and the scraper to ensure that the auger does not contact the paved or gravel surface. Adjust the skids and the scraper as needed to compensate for wear.
-
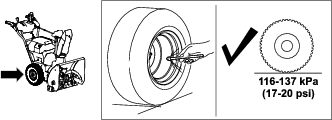
Check the tire pressure; refer to Checking the Tire Pressure.
-
Loosen the nuts that secure both skids to the auger sides until the skids slide up and down easily.
Important: The auger blades must be supported above the ground by the skids.
-
Ensure that the scraper is 3 mm (1/8 inch) above and parallel to a level surface.
Note: If the pavement is cracked, rough, or uneven, adjust the skids to raise the scraper. For gravel surfaces, adjust the skids further down to prevent the machine from picking up rocks.
-
Move the skids down until they are even with the ground.
-
Firmly tighten the nuts that secure both skids to the auger sides.
Note: To easily adjust the skids if they loosen, support the scraper 3 mm (1/8 inch) off the pavement, then adjust the skids down to the pavement.
Note: If the skids become excessively worn, you can turn them over and set the unused side toward the pavement.
Checking and Adjusting the Traction Cable
| Maintenance Service Interval | Maintenance Procedure |
|---|---|
| After the first 2 hours |
|
| Yearly |
|
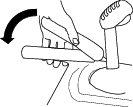
If the machine does not drive in the forward or reverse speeds or it drives when you release the traction lever, adjust the traction cable.
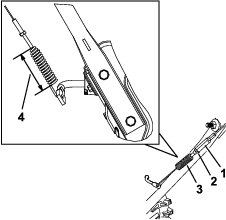
If the left (traction) cable is not properly adjusted, do the following steps:
-
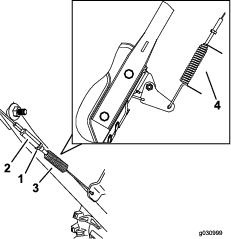
Loosen the jam nut.
-
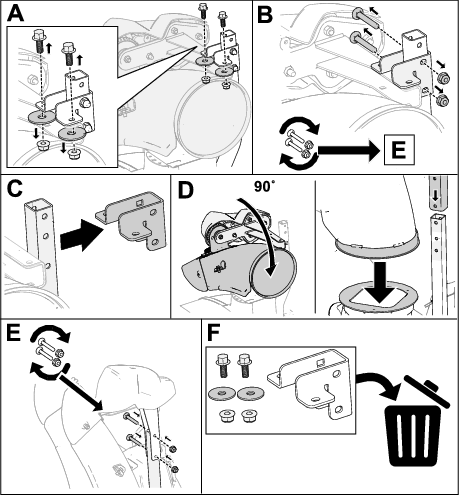
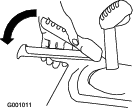
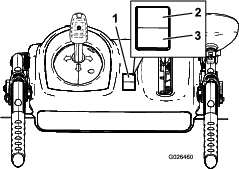
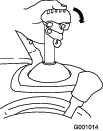
Engage the traction lever and hold it in place (Figure 29).
-
Loosen or tighten the turnbuckle to adjust the spring length to 5.5 cm (2–3/16 inches) as shown in Figure 30.
-
Tighten the jam nut (Figure 30), ensuring that there is slight tension on the cable.
-
If the traction cable is properly adjusted but a problem remains, contact an Authorized Service Dealer.
Checking and Adjusting the Auger/Impeller Cable
| Maintenance Service Interval | Maintenance Procedure |
|---|---|
| After the first 2 hours |
|
| Yearly |
|
-
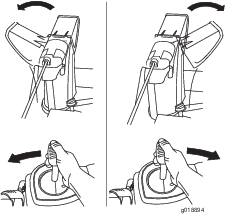
Loosen the jam nut (Figure 32).
-
Engage the auger/impeller lever and hold it in place (Figure 31).
-
Loosen or tighten the turnbuckle to adjust the spring length to 6.6 cm (2-3/5 inches) as shown in Figure 32.
-
Tighten the jam nut (Figure 32), ensuring that there is slight tension on the cable.
-
Turn on the machine and attempt to engage the auger/impeller drive without moving the lock switch back; if the auger rotates, loosen the turnbuckle so that the auger does not engage.
-
If the auger/impeller cable is properly adjusted but a problem remains, contact an Authorized Service Dealer.
Checking the Auger-Gearbox-Oil Level
| Maintenance Service Interval | Maintenance Procedure |
|---|---|
| Yearly |
|
-
Move the machine to a level surface.
-
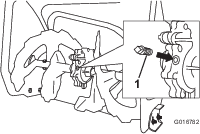
Clean the area around the pipe plug (Figure 33).
-
Remove the pipe plug from the gearbox.
-
Check the oil level in the gearbox. The oil should be 9.5 mm (3/8 inch) below the filler opening.
-
If the oil level is low, add GL-5 or GL-6, SAE 80-90 EP gear oil lubricant to the gearbox until the oil level is 9.5 mm (3/8 inch) below the filler opening.
Note: Do not use synthetic oil.
-
Install the pipe plug in the gearbox.
Lubricating the Hex Shaft
| Maintenance Service Interval | Maintenance Procedure |
|---|---|
| Yearly |
|
Lightly lubricate the hex shaft yearly with automotive engine oil (Figure 34).
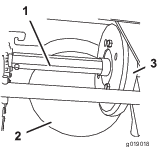
Important: Do not get oil on the rubber wheel or the steel friction pulley because the traction drive will slip (Figure 34).
-
Drain the fuel from the fuel tank.
-
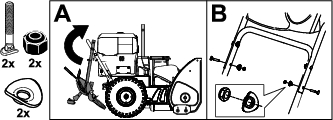
Tip the machine forward onto its auger housing and block it so that it cannot fall.
-
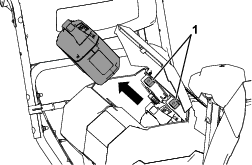
Remove the back cover (Figure 35).

-
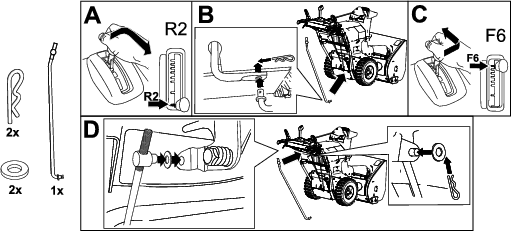
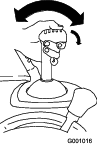
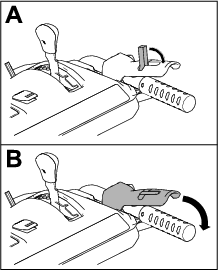
Move the speed-selector lever to Position R2.
-
Dip your finger in automotive engine oil and lightly lubricate the hex shaft.
-
Move the speed-selector lever to Position 6.
-
Lubricate the other end of the hex shaft.
-
Move the speed-selector lever forward and rearward a few times.
-
Install the back cover and return the machine to the operating position.
Replacing the Drive Belts
If the auger/impeller drive belt or the traction-drive belt becomes worn, oil-soaked, or otherwise damaged, have an Authorized Service Dealer replace the belt.
