Installation
Preparing the Machine
-
Park the machine on a level surface.
-
Engage the parking brake.
-
Shut off the machine and remove the key.

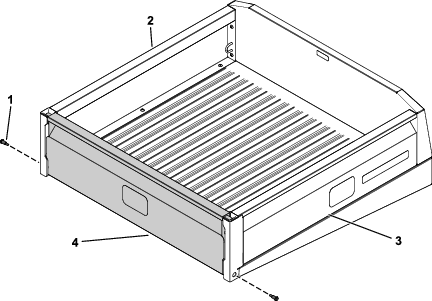
Installing the Steel Cargo Bed Solid Sides
Parts needed for this procedure:
| Front panel assembly | 1 |
| Left bed side assembly | 1 |
| Right bed side assembly | 1 |
| Tailgate assembly | 1 |
| Torx-head screw (5/16 x 3/4 inch) | 15 |
| Flange-head shoulder bolt (5/16 x 1-1/2 inches) | 2 |
| Button-head shoulder bolt (5/16 x 1/2 inch) | 4 |
| Lanyard | 2 |
| Anti-rattle tailgate plug | 2 |
| 0.2 oz tube of Loctite® 243 | 1 |
-
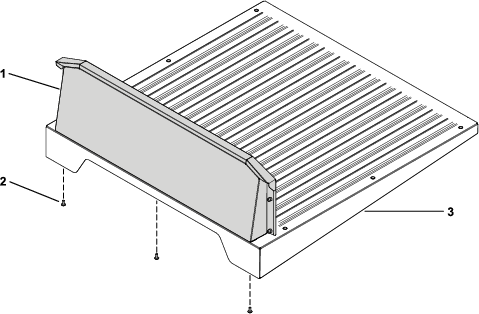
From underneath the cargo bed, loosely secure the front panel assembly to the cargo bed using 3 torx-head screws (5/16 x 3/4 inch) as shown in Figure 2.
-
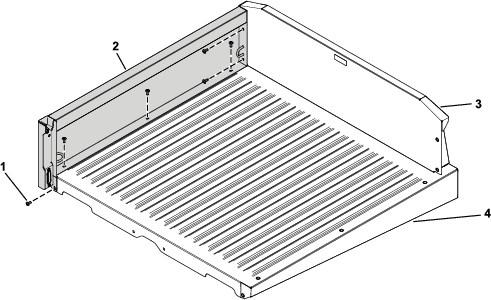
Loosely secure the left bed side assembly to the front panel assembly and cargo bed using 6 torx-head screws (5/16 x 3/4 inch) as shown in Figure 3.
-
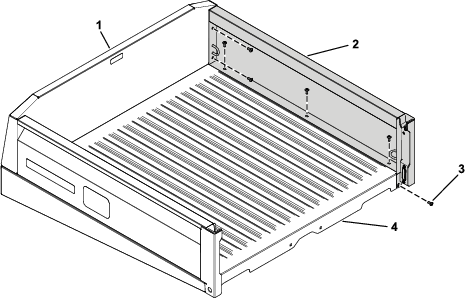
Loosely secure the right bed side assembly to the front panel assembly and cargo bed using 6 torx-head screws (5/16 x 3/4 inch) as shown in Figure 4.
-
Torque the 15 torx-head screws (5/16 x 3/4 inch) to 20 to 26 N∙m (15 to 19 ft-lb).
-
Apply Loctite® 243 to the threads of the 2 flange-head shoulder bolts (5/16 x 1-1/2 inches).
-
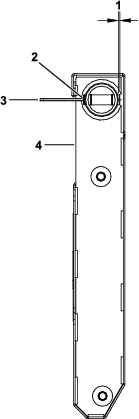
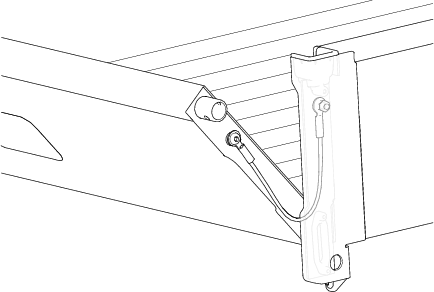
Loosely secure the tailgate assembly to the left and right bed side assemblies using the 2 flange-head shoulder bolts (5/16 x 1-1/2 inches) as shown in Figure 5.
-
Torque the 2 flange-head shoulder bolts (5/16 x 1-1/2 inches) to 23 N∙m (17 ft-lb).
-
Secure the 2 lanyards to the tailgate assembly using the 4 button-head shoulder bolts (5/16 x 1/2 inch) as shown in Figure 6.
-
Install the 2 anti-rattle tailgate plugs and ensure that 1.5 mm (1/16 inch) of the plugs protrude from the tailgate-latch pin (Figure 7).
-
Trim the installation tab so that it is flush with the plug body (Figure 7).