


Maintenance
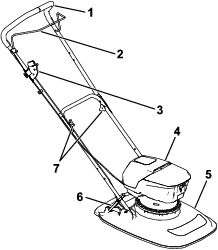
Note: Determine the left and right sides of the machine from the normal operating position.
Recommended Maintenance Schedule(s)
| Maintenance Service Interval | Maintenance Procedure |
|---|---|
| Before each use or daily |
|
| After each use |
|
| Yearly |
|
Preparing for Maintenance
-
Move the machine to a level surface.
-
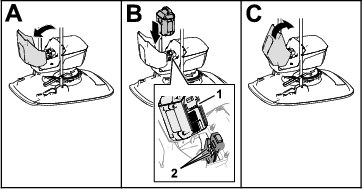
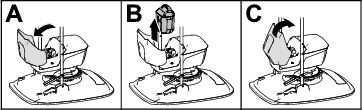
Shut off the machine, remove the electric-start button, and remove the battery; refer to Shutting Off the Machine.
Blade Maintenance
Warning
When servicing the blade, the blade can still move even though the power source is off. The blade is sharp; contacting the blade can result in serious personal injury.
-
Keep your hands and feet away from a moving blade.
-
Wear gloves when servicing the blade.
Checking the Blade
| Maintenance Service Interval | Maintenance Procedure |
|---|---|
| Before each use or daily |
|
-
Prepare the machine for maintenance; refer to Preparing for Maintenance.
-
Tip the machine onto its side.
-
Check the blade for wear or damage.
-
If the blade is damaged or cracked, remove and replace it immediately.
-
If the blade edge is dull or nicked, remove it, have it sharpened or replaced, and install the blade.
-
-
Tip the machine upright.
Replacing the Blade
| Maintenance Service Interval | Maintenance Procedure |
|---|---|
| Yearly |
|
Important: You need a torque wrench to install the blade. If you do not have a torque wrench or are uncomfortable performing this procedure, contact an Authorized Service Dealer or authorized Toro distributor.
Removing the Blade
-
Prepare the machine for maintenance; refer to Preparing for Maintenance.
-
Tip the machine onto its side.
-
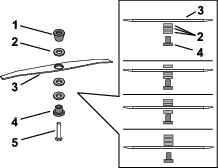
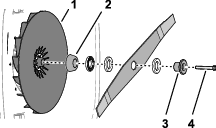
Record the position of the spacers.
-
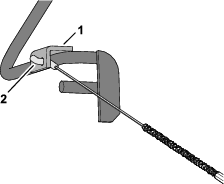
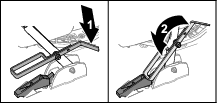
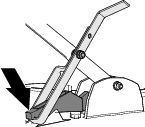
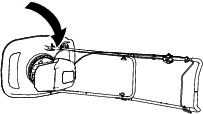
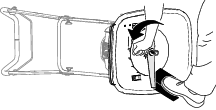
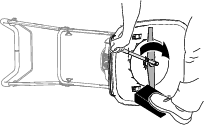
Use a block of wood to hold the blade steady (Figure 30).
-
Use the wrench provided with the machine to remove the blade by rotating the blade bolt counterclockwise (Figure 29).
Important: Wear safety glasses and cut resistant gloves when removing the blade.
Installing the Blade
-
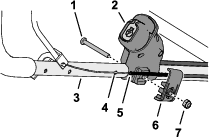
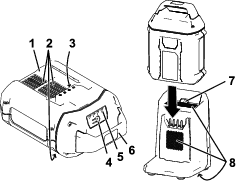
Align the curved ends of the blade toward mower deck, and assemble the retainer, blade, spacers, and conical spacer to the impeller with the bolt.
Important: You must always assemble the conical spacer directly below the impeller and the retainer under the head of the bolt.
-
Torque the blade bolt to 75 N∙m (55 ft-lb).
Important: A bolt torqued to 75 N∙m (55 ft-lb) is very tight. While holding the cutting blade with block of wood, put your weight behind the torque wrench, and tighten the bolt.
-
Tip the machine upright.
Cleaning the Machine
| Maintenance Service Interval | Maintenance Procedure |
|---|---|
| Before each use or daily |
|
| After each use |
|
Warning
The machine may dislodge material from under the machine housing.
-
Wear eye protection.
-
Stay in the operating position (behind the handlebar).
-
Do not allow bystanders in the area.
-
Shut off the machine, remove the electric-start button, and remove the battery; refer to Shutting Off the Machine.
-
Tip the machine on its side.
-
Use a brush or compressed air to remove grass and debris from the motor housing and the surrounding deck areas.