


Maintenance
After each use of the edger, complete the following:
-
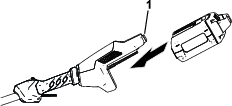
Remove the battery from the edger.
-
Wipe the edger clean with a damp cloth. Do not hose the edger down or submerge it in water.
-
Wipe or scrape clean the cutting head area any time there is an accumulation of debris.
-
Check and tighten all fasteners. If any part is damaged or lost, repair or replace it.
-
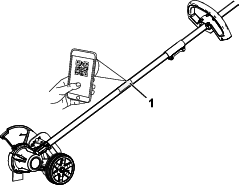
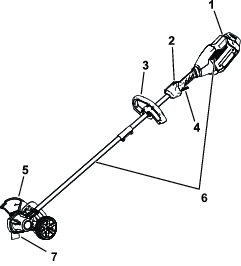
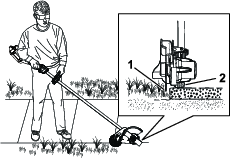
Brush debris away from air intake vents and exhaust on motor housing to prevent the motor from overheating (Figure 5).
Replacing the Blade
If the blade becomes worn, bent, or damaged, replace it; contact your Authorized Service Dealer.
-
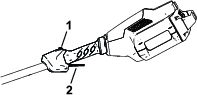
Ensure that the battery is removed from the machine.
-
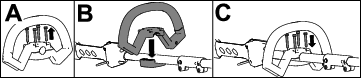
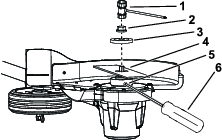
Secure the blade so that it cannot spin by inserting a screwdriver (not included) to the slot in the edger head as shown in Figure 14.
Note: You may need to turn the blade to find the slot
-
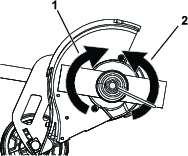
Remove the blade nut by turning it clockwise using the edger adjustment tool provided (Figure 13).
-
Remove the blade washer and the old blade (Figure 14).
Note: You may discard the old blade.
-
Install the new blade and secure it with the previously removed blade washer and blade nut.
-
Tighten the blade nut by turning it counterclockwise with the wrench provided (Figure 13).
Replacing the Wheel
-
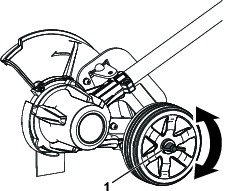
Ensure that the battery is removed from the machine.
-
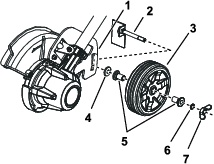
Remove the wing nut, washer, bushings, wheel, rubber washer, and wheel axle from the depth-of-cut track on the edger (Figure 15).
-
Replace any damaged or missing parts; contact your Authorized Service Dealer.
-
Insert the wheel axle through the track with the tab facing down as shown in Figure 15.
-
Install the rubber washer, bushings, wheel, small washer, and wing nut to the axle (Figure 15).
-
Tighten the wing nut to secure the wheel.
Replacing the Skid Plate
If the skid plate becomes worn or damaged, replace it; contact your Authorized Service Dealer.
-
Ensure that the battery is removed from the machine.
-
Remove the 2 screws securing the skid plate to the edger (Figure 12).

-
Replace the skid plate and secure it using the 2 screws removed previously.

