-
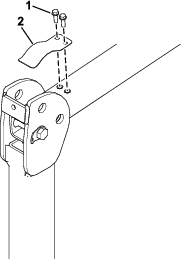
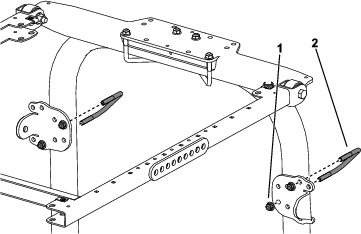
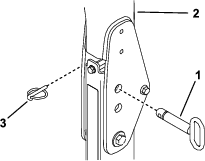
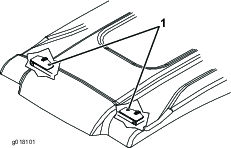
With the roll bar in the lowered position, remove
the anti-rattle leaf spring (Figure 22) from each side of the roll
bar.
Retain the leaf springs and the bolts for use when
the canopy is not installed.
-
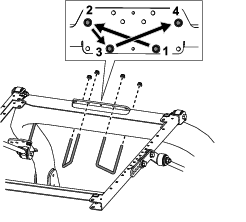
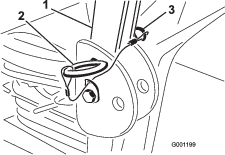
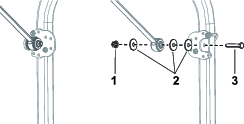
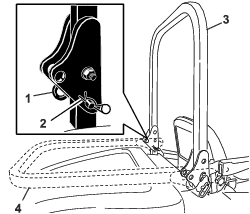
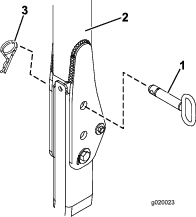
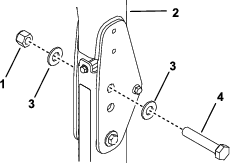
With the roll bar in the raised position, remove the
hairpin cotters and the 2 pins (Figure 23).
-
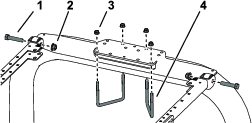
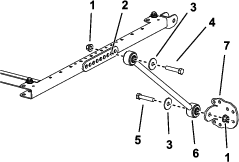
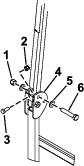
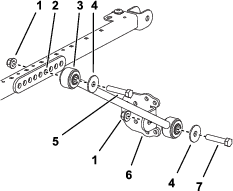
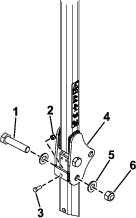
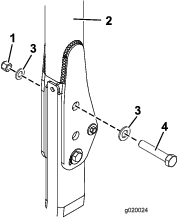
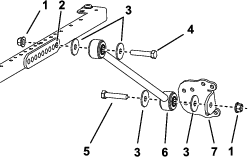
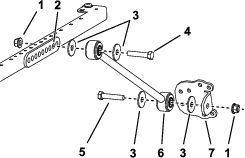
Insert a washer (13/16 x 1-1/2 inches) onto each bolt
(3/4 x 4 inches) as shown in Figure 24.
-
In the holes where the pins were removed, install
the bolts and washers (Figure 24).
-
Install another washer onto each bolt and secure with
nuts (3/4 inch) as shown in Figure 24. Torque the nuts 323 to 396
N∙m (238 to 292 ft-lb).
-
Install a bolt (3/8-16 x 1 inch or 1-1/4 inches) with
a jam nut (bolts and jam nuts are not provided) in the threaded plate
on each side of the lower portion of the roll bar in the hinge area
(Figure 24).
Tighten the bolt until it is tight against the upper roll-bar tube
and tighten the jam nut.
-
Torque the ROPS pivot bolt (Figure 24) to 91 to 113 N∙m (67 to 83
ft-lb) to avoid any bouncing of the roll bar and sunshade.
-
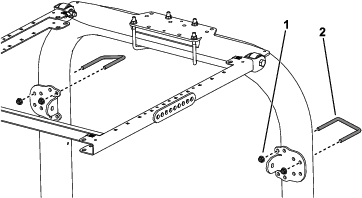
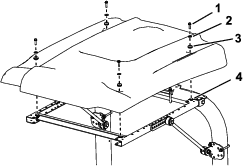
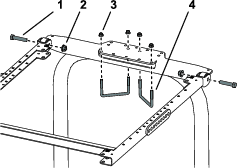
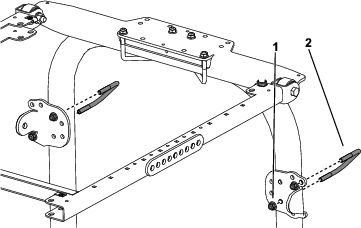
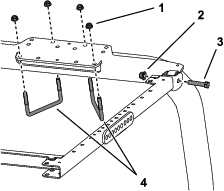
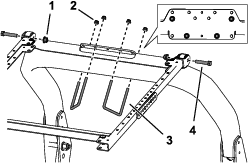
Position the ROPS-mount bracket onto the top of the
traction unit roll bar (Figure 25).
Note: Make sure that the roll bar is centered in the ROPS-mount bracket.
-
Using the mounting holes shown in Figure 25, mount
the bracket to the top of the roll bar with 2 U-bolts (4-1/2 x 2-3/4
inch) and 4 flange nuts.
-
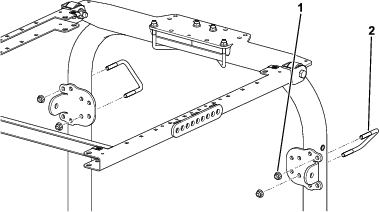
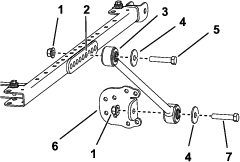
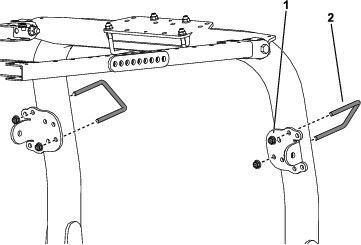
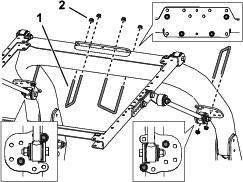
Using the mounting holes shown in Figure 26, loosely
secure each of the brace brackets to the roll bar posts with a U-bolt
(3-1/2 x 2-3/4 inches) and 2 flange nuts.
-
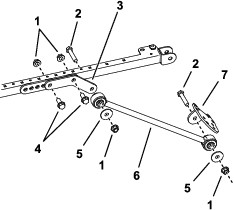
On each side of the sunshade frame, loosely mount
a brace to the sixth hole of the bracket mount with a bolt (1/2 x
2-3/4 inches), washer (1/2 inch), and flange nut (1/2 inch) as shown
in Figure 27.
-
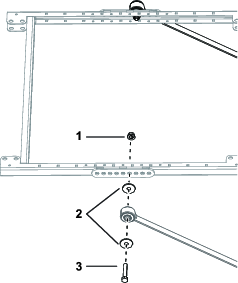
Loosely install a brace bracket to each brace with
a bolt (1/2 x 2-1/2 inches), washer (1/2 inch), and flange nut (1/2
inch) as shown in Figure 27.
Note: The U-bolts are not installed symmetrically.
-
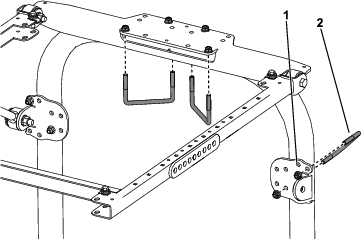
Move the brace brackets up or down on the vertical
roll bar posts until the sunshade frame is level to the floor. Use
a level to make sure that the frame is level to the ground. Then,
tighten the U-bolt flange nuts, securing the brace brackets to the
posts.
Note: Use the front or rear mounting holes, in the brace bracket,
if more adjustability is required.
-
Tighten all the remaining flange nuts as follows:
-
While aligning the mounting holes, position the sunshade
onto the frame as shown in Figure 28.
-
Loosely mount each corner of the sunshade to the frame
with a flange-head bolt (5/16 x 1-1/4 inches) a small washer, and
a grommet (Figure 28).
-
Tighten the sunshade-mounting bolts 5 to 6 N∙m (45
to 55 in-lb).
Important: Do not overtighten the mounting bolts as the sunshade may crack.