Introduction

These chargers and battery packs are intended to be used by homeowners and professional operators. These battery packs are designed to be charged only by Flex-Force 60V lithium-ion battery chargers. These chargers are designed to charge only Flex-Force 60V lithium-ion battery packs. They are not designed to charge any other batteries. Using these products for purposes other than their intended use could prove dangerous to you and bystanders.

Read this information carefully to learn how to operate and maintain your product properly and to avoid injury and product damage. You are responsible for operating the product properly and safely.

Whenever you need service, genuine parts, or additional information, contact an Authorized Service Dealer or distributor, or the tool manufacturer’s Customer Service, and have the model and serial numbers of your product ready. Figure 1 identifies the location of the model and serial numbers on the product. Write the numbers in the space provided.

Important: With your mobile device, you can scan the QR code on the serial number decal (if equipped) to access warranty, parts, and other product information.

g450101

Safety-Alert Symbol

The safety-alert symbol (Figure 2) shown in this manual and on the machine identifies important safety messages that you must follow to prevent accidents.

g000502

The safety-alert symbol appears above information that alerts you to unsafe actions or situations and is followed by the word DANGER, WARNING, or CAUTION.

DANGER indicates an imminently hazardous situation which, if not avoided, will result in death or serious injury.

WARNING indicates a potentially hazardous situation which, if not avoided, could result in death or serious injury.

CAUTION indicates a potentially hazardous situation which, if not avoided, may result in minor or moderate injury.

This manual uses two other words to highlight information. Important calls attention to special mechanical information and Note emphasizes general information worthy of special attention.

Safety

Graphic

Safety decals and instructions are easily visible to the operator. Replace any decal that is damaged or missing.

The following tables describe the safety symbols that appear on the decals.

Battery Charger Safety Symbols

Graphic

Read the Operator’s Manual.

Graphic

For indoor use only.

Graphic

Double insulated

Setup

Mounting the Battery Charger (Optional)

If desired, mount the battery charger securely on a wall using the wall-mount key holes on the back of the charger.

Mount it indoors (such as a garage or other dry place), near a power outlet, and out of the reach of children.

Refer to Figure 3 for assistance in mounting the charger.

Slide the charger over the appropriately positioned hardware to secure the charger in place (hardware not included).

g290534

Product Overview

Battery Charger

Model8690286905
Type60V MAX Lithium-Ion Battery Charger60V MAX Lithium-Ion Battery Rapid Charger
Input100 to 240V AC ~2.0A, 50/60Hz100 to 240V AC ~5.0A, 50/60Hz
Output60V DC 2.0A MAX60V DC Graphic 5.5A MAX

Appropriate Temperature Ranges

Charge battery pack at5°C (41°F) to 40°C (104°F)*
Use battery pack at-30°C (-22°F) to 49°C (120°F)
Store battery pack/charger at5°C (41°F) to 40°C (104°F)*

*Charging time will increase if you do not charge the battery within this range.

Store the tool, battery pack, and battery charger in an enclosed clean, dry area.

Compatible Batteries

ModelBattery quantityCapacity

88920

1

2.0 Ah (102 Wh)

88925

1

2.5 Ah (135 Wh)

88941

1

4.0 Ah (216 Wh)

88950

1

5.0 Ah (270 Wh)

88960

1

6.0 Ah (324 Wh)

88975

1

7.5 Ah (405 Wh)

88980

1

8.0 Ah (432 Wh)

66910

1

10.0 Ah (540 Wh)

66912

1

12.0 Ah (648 Wh)

Warning

Do not recharge non-rechargeable batteries.

Operation

Charging the Battery Pack

Important: The battery pack is not fully charged when you purchase it. Before using the tool for the first time, place the battery pack in the charger and charge it until the LED display indicates the battery pack is fully charged. Read all safety precautions.

Important: Charge the battery pack only in temperatures that are within the appropriate range; refer to Specifications.

Note: At any time, press the battery-charge-indicator button on the battery pack to display the current charge (LED indicators).

  1. Ensure that the vents on the battery and charger are clear of any dust and debris.

    g473274
  2. Line up the cavity in the battery pack (Figure 4) with the tongue on the charger.

  3. Slide the battery pack into the charger until it is fully seated (Figure 4).

  4. To remove the battery pack, slide the battery backward out of the charger.

  5. Refer to the following table to interpret the LED indicator light on the battery charger.

    Battery Charge Status

    Charger SymbolIndicator LightIndicates
    GraphicGreen blinkingBattery pack is charging
    GraphicGreenBattery pack is charged
    GraphicRedBattery pack and/or battery charger is over or under the appropriate temperature range
    GraphicRed blinkingBattery pack charging fault*
     OffNo battery pack inserted

*Refer to for more information.

Important: The battery can be left on the charger for short periods between uses.If the battery will not be used for longer periods, remove the battery from the charger; refer to Storage.

Maintenance

Maintenance and servicing are not required under normal conditions.

When you clean the surface of the equipment, wipe it only with a dry cloth.

Do not disassemble the equipment; if it is damaged, contact your Authorized Service Dealer or distributor.

Storage

Important: Store the tool, battery pack, and charger only in temperatures that are within the appropriate range; refer to Specifications.

Important: If you are storing the tool for a year or longer, remove the battery pack from the tool and charge the battery pack until 1 or 2 LED indicators turn green on the battery. Do not store a fully charged or fully depleted battery. When you are ready to use the tool again, charge the battery pack until the left indicator light turns green on the charger or all 4 LED indicators turn green on the battery.

  • Disconnect the product from the power supply (i.e., remove the battery pack) and check for damage after use.

  • Clean all foreign material from the product.

  • Do not store any machine with the battery pack installed.

  • When not in use, store the tool, battery pack, and battery charger out of the reach of children.

  • Keep the tool, battery pack, and battery charger away from corrosive agents, such as garden chemicals and de-icing salts.

  • To reduce the risk of serious personal injury, do not store the battery pack outside or in vehicles.

  • Store the tool, battery pack, and battery charger in an enclosed clean, dry area.

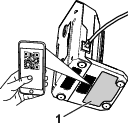
Preparing the Battery Pack for Recycling

Important: Upon removal, cover the terminals of the battery pack with heavy-duty adhesive tape. Do not attempt to destroy or disassemble the battery pack or remove any of its components.

GraphicGraphic Contact your local municipality or your authorized Authorized Service Dealer or distributor for more information on how to responsibly recycle the battery.

Graphic

Lithium-ion battery packs labeled with the Call2Recycle seal can be recycled at any participating retailer or battery recycling facility in the Call2Recycle program (US and Canada only). To locate a participating retailer or facility closest to you, please call 1-800-822-8837 or visit www.call2recycle.org.

Graphic

Lithium-ion battery packs labeled with the High Energy Battery (HEB) seal shown here, and any 60V Flex-Force batteries 6.0 Ah or greater, can be recycled at any participating dealer or retailer in the Call2Recycle HEB program. To locate a participating dealer or retailer closest to you, please visit www.hebattery.org.

If you cannot locate a participating retailer or facility nearby, or have questions about which recycling program your battery pack may qualify for, please visit the customer support site listed in the operator’s manual for your tool/equipment for more information on how to responsibly recycle the battery pack.

If you are located outside of the US and Canada, please contact your Authorized Service Dealer or distributor for more information on how to responsibly recycle the battery pack.

Troubleshooting

Perform only the steps described in these instructions. All further inspection, maintenance, and repair work must be performed by an authorized service center or a similarly qualified specialist if you cannot solve the problem yourself.

ProblemPossible CauseCorrective Action
The battery pack loses charge quickly.
  1. The battery pack is over or under the appropriate temperature range.
  1. Move the battery pack to a place where it is dry and the temperature is between 5°C (41°F) and 40°C (104°F).
The battery charger is not working.
  1. The battery charger is over or under the appropriate temperature range.
  2. The outlet that the battery charger is plugged into does not have power.
  1. Unplug the battery charger and move it to a place where it is dry and the temperature is between 5°C (41°F) and 40°C (104°F).
  2. Contact your licensed electrician to repair the outlet.
The LED indicator light on the battery charger is red.
  1. The battery charger and/or battery pack is over or under the appropriate temperature range.
  1. Unplug the battery charger and move the battery charger and battery pack to a place where it is dry and the temperature is between 5°C (41°F) and 40°C (104°F).
The LED indicator light on the battery charger is blinking red.
  1. There is an error in the communication between the battery pack and the charger.
  2. The battery pack is weak.
  1. Remove the battery pack from the battery charger, unplug the battery charger from the outlet, and wait 10 seconds. Plug the battery charger into the outlet again and place the battery pack on the battery charger. If the LED indicator light on the battery charger is still blinking red, repeat this procedure again. If the LED indicator light on the battery charger is still blinking red after 2 attempts, properly dispose of the battery pack at a battery recycling facility.
  2. Contact your authorized service dealer or distributor if the battery is in warranty, or properly dispose of the battery pack at a battery recycling facility.
The tool does not run or does not run continuously.
  1. There is moisture on the leads of the battery pack.
  2. The battery is not fully installed into the tool.
  1. Allow the battery pack to dry or wipe it dry.
  2. Remove and then replace the battery into the tool making sure that it is fully installed and latched.