Park the
machine on a level surface, engage the parking brake, and lower the
boom.
Shut off
the engine and remove the key.
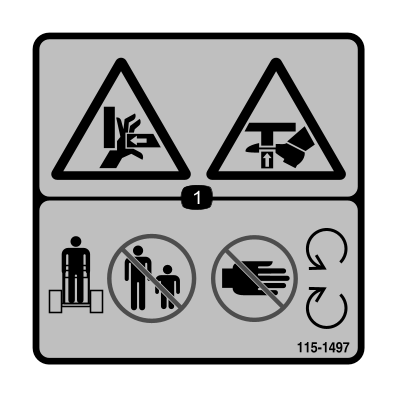
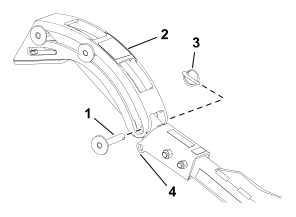
If installed,
remove the safety-bar extension from the safety-rail assembly.
Safety-bar extension
for 91 cm (3 ft) boom shown.
G569916s
- Bolt—1/2 x 3 inches (2)
- Nut—1/2 inch (2)
- Safety-bar
extension
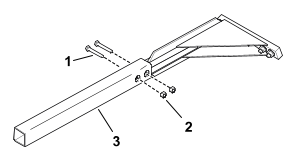
If needed,
install the crumber-extension bar (supplied with the boom) over the
end of the safety-rail assembly and secure
it using the 2 bolts and locknuts.
Note: Some boom and chain configurations need an extension for the safety-rail
assembly to ensure that the crumber does not contact
the chain or digging teeth. Refer to your Authorized
Service Dealer for more information.
Crumber-extension
bar for 91 cm (3 ft) boom shown.
G244620s
- Bolt—1/2 x 3 inches (2)
- Nut—1/2 inch (2)
- Crumber-extension
bar
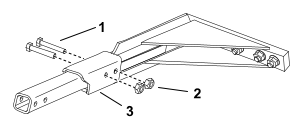
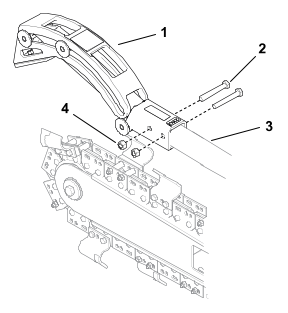
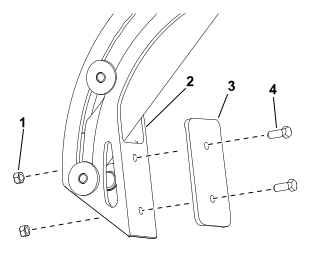
Install the
crumber over the safety-rail assembly or crumber-extension bar and
secure it using 2 bolts and locknuts.
G572859
- Crumber
- Bolt
- Trencher
safety-rail assembly
- Locknut