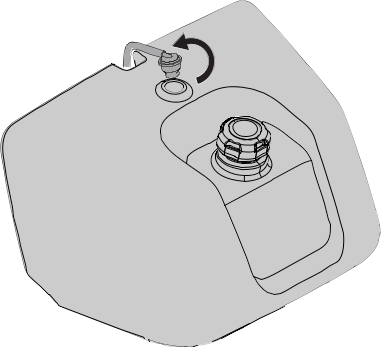
Fuel Tank Kit

Greensmaster® 3300, 3320, 3400, or 3420 TriFlex® Traction Unit

Preparing the Machine

  1. Park the machine on a level surface.
  2. If equipped with cutting units or attachments, lower them to the ground.
  3. Engage the parking brake, shut off the engine, wait for all machine movement to stop, and remove the key.
  4. Wait for the machine to cool.

Removing the Fuel Tank

  1. Danger
    In certain cases, fuel is extremely flammable and highly explosive. A fire or explosion from fuel can burn you and others and can damage property.
    Refer to your Operators Manual for a complete list of fuel-related precautions.
     
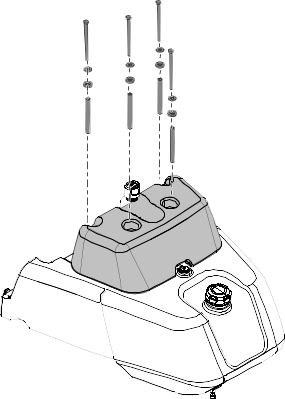
    Remove the hardware securing the leak detector tank and remove the leak detector tank.
    Note: Retain the hardware and the leak detector tank.
    Graphic
    G603481
  2. Drain the fuel tank. Refer to the Operators Manual for instructions.
  3. Remove the fuel valve and hardware securing the fuel tank to the machine. Remove and discard the fuel tank.
    Graphic
    G603485
  4. Remove and discard the existing fuel hoses.
  5. For gas models, do not remove the fuel filter and the fuel pump.
  6. For diesel models, remove the fuel filter but do not remove the fuel pump.

Installing the Gas Fuel Tank (Model No. 164-5502)

Parts Required
1
Gas fuel tank
1
Small radiator clamp
1
Fuel hose [43.18 cm (17 inches)]
1
Hose clamp
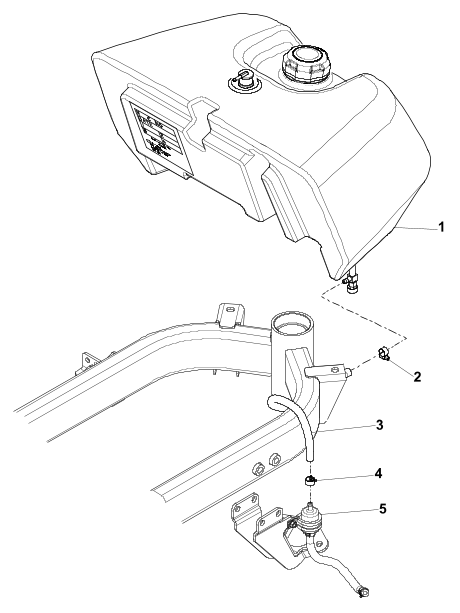
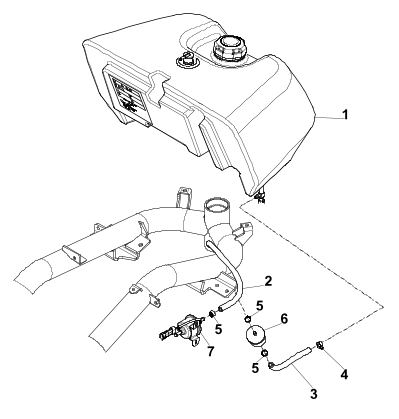
  1. Install the 43.18 cm (17 inches) hose to the valve on the bottom of the new fuel tank with the small radiator clamp .
    Graphic
    G603745
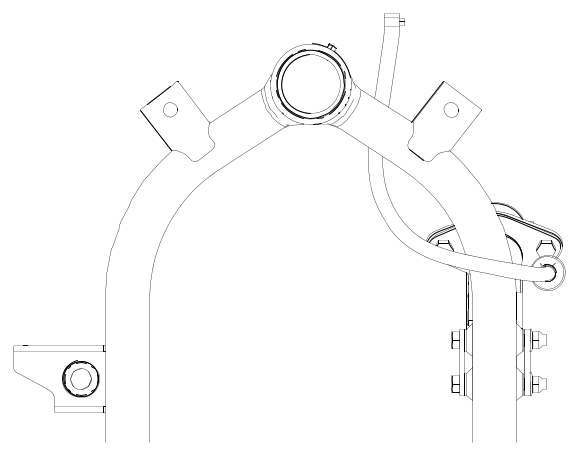
  2. Route the 43.18 cm (17 inches) hose as shown and place the fuel tank on the machine.
    Figure 1 Top View Shown
    Graphic
    G603545
  3. Secure the fuel tank to the machine with the previously removed fuel tank hardware.
  4. Slide a hose clamp onto the hose.
  5. Install the hose to the fuel filter and secure it with the hose clamp.
  6. Install the previously removed leak detector tank and secure by hand, using the previously removed hardware.

Installing the Diesel Fuel Tank (Model No. 164-5503)

Parts Required
1
Diesel fuel tank
1
Small radiator clamp
1
Fuel hose [35.56 cm (14 inches)]
1
Fuel hose [17.78 cm (7 inches)]
3
Hose clamp
1
Fuel filter
  1. Install the 17.78 cm (7 inches) hose to the valve on the bottom of the new fuel tank with the small radiator clamp .
    Graphic
    G603748
  2. Slide a hose clamp onto the 17.78 cm (7 inches) hose.
  3. Install the 17.78 cm (7 inches) hose to the new fuel filter and secure it with the hose clamp.
  4. Slide a hose clamp onto the 35.56 cm (14 inches) hose.
  5. Install the 35.56 cm (14 inches) hose to the new fuel filter and secure it with the hose clamp.
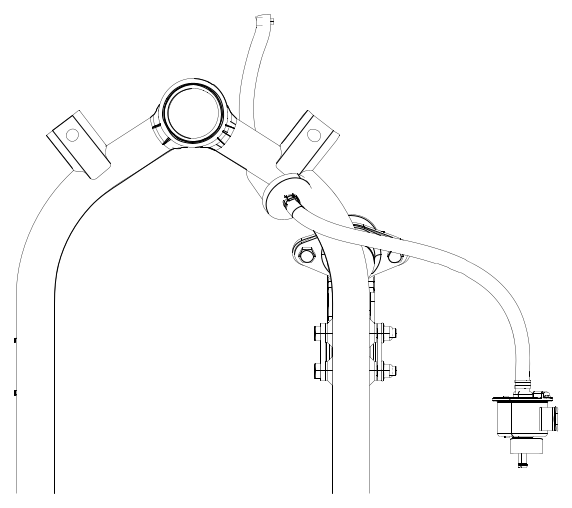
  6. Route the 35.56 cm (14 inches) hose as shown and place the fuel tank on the machine.
    Figure 2 Top View Shown
    Graphic
    G603546
  7. Secure the fuel tank to the machine with the previously removed fuel tank hardware.
  8. Slide a hose clamp onto the 35.56 cm (14 inches) hose.
  9. Install the hose to the fuel pump and secure it with the hose clamp.
  10. Install the previously removed leak detector tank and secure by hand, using the previously removed hardware.

Finishing the Installation

  1. Rotate the key switch to the On position for 10 to 15 seconds to allow the electric fuel pump to prime the fuel system.
    Important  
    Do not use the starter motor to crank the engine to prime the fuel system. This will damage the starter motor.
     
  2. Check for any leaks and repair them as needed.