Thatching Kit
Greensmaster® 3300/3400 Series TriFlex® Dethatching Unit
Installation Instructions
Preparing
the Machine
-
Park the
machine on a level surface.
-
Engage the
parking brake, shut off the machine, and remove the key.
-
Wait for
the machine to cool and all machine movement to stop.
Installing
the Transport Rollers
-
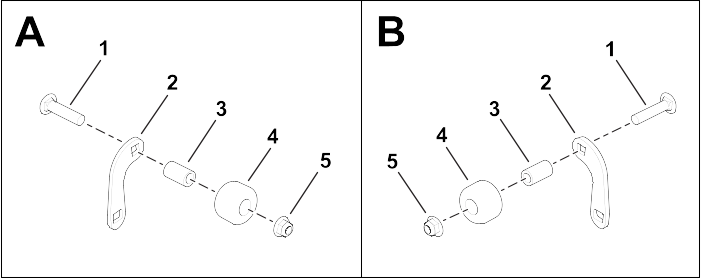
Install the
rollers onto the roller brackets.
-
For the left
side of the unit, install the hardware as shown in box A.
-
For the right
side of the unit, install the hardware as shown in box B.
G609860
-
Screw (3/8 x 1-3/4 inches)
-
Roller bracket
-
Tube spacer
-
Roller
-
Nut (3/8 inch)
-
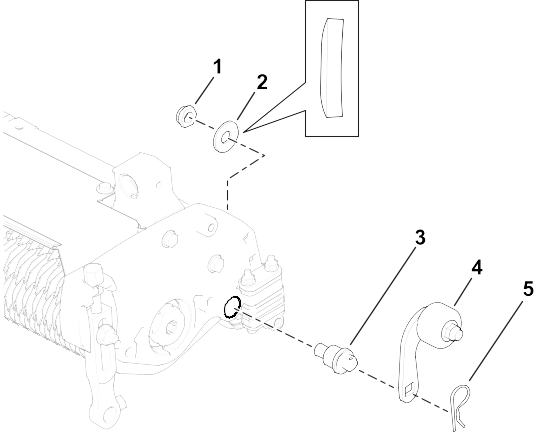
Install the
roller assemblies to each side of the dethatching unit.
Note: Ensure that the curved washer is oriented as shown.
Left Side
Shown
G608904
-
Locknut (1/2 inch)
-
Curved washer
-
Roller mount pin
-
Roller assembly
-
Hairpin cotter
-
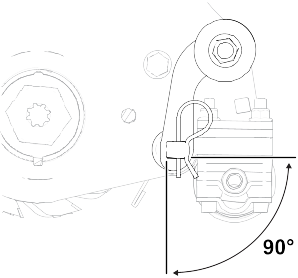
Ensure that
the roller mount pin is oriented as shown.
-
Torque the
locknut (1/2 inch) to 47
to 50 N∙m (35 to 37 ft-lb).
Adjusting
the Transport Rollers
To protect the blades from hard
surface contact, place the transport rollers into the lowered position
before lowering the dethatching units to the
shop floor or removing them from the traction unit.
-
Remove the
hairpin cotter that secures the roller bracket to the roller mount
pin.
-
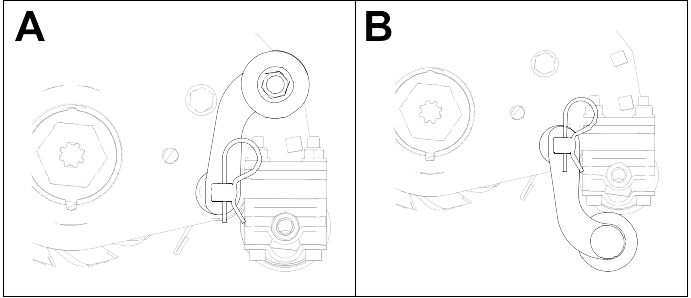
Position
the transport roller:
-
For the stowed
position  , raise the roller bracket.
-
For the lowered
position  , lower the roller bracket.
-
Secure the
roller bracket to the roller mount pin with the hairpin cotter.
-
Repeat on
the other side.