Installation
Removing the Fuel Tank
Danger
In certain conditions, fuel is extremely flammable and highly explosive. A fire or explosion from fuel can burn you and others and can damage property.
-
Drain fuel from the fuel tank when the engine is cold. Do this outdoors in an open area. Wipe up any fuel that spills.
-
Never smoke when draining fuel, and stay away from an open flame, or where a spark may ignite the fuel fumes.
-
Park the machine on a level surface, shut off the engine, chock the wheels, disconnect the battery, and remove the key.
-
Allow the engine to cool, then drain the fuel tank into a fuel container using a pump.
Note: Dispose of fuel properly. Recycle according to local codes.
-
Start the engine and run it until it stops.
-
Choke the engine. Start and run the engine until it does not start.
-
Disconnect the fuel tank hoses from the machine and discard them.
Note: Retain the hose clamps.
-
Remove the fasteners and straps securing the fuel tank to the machine and discard them along with the tank.
-
Disconnect the remaining hoses from the carbon canister.
Note: Retain the hose clamps.
-
Remove the battery cover and battery; refer to your Operator’s Manual.
-
Remove the carbon canister and discard it.
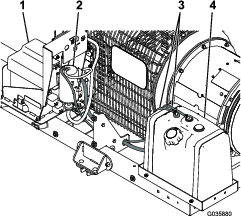
Installing the 10 Gallon Tank
-
Remove the existing fuel-tank mount and install the new 10 gallon tank mount using 4 carriage bolts (5/16 inch) and 4 flange nuts (5/16 inch) through the holes in the tray.
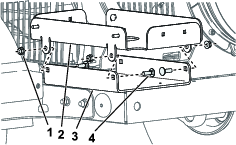
-
Install the fuel-tank mount as follows:
-
If your machine is model year 2021 and later, install the fuel-tank mount using spacers and the fasteners provided with the kit.
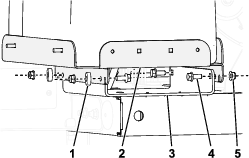
-
If your machine is model year 2016–2020, install the fuel-tank mount without spacers. Use only the fasteners provided with the kit.
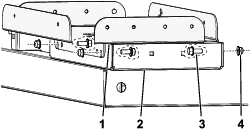
-
-
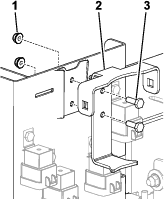
Attach the carbon-canister bracket to the frame using 2 bolts (1/4 inch) and 2 flange nuts (1/4 inch).
Note: If the bracket does not perfectly line up with the existing holes, widen them slightly using a 7 mm drill bit.
-
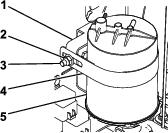
Secure the carbon canister to the bracket as shown using the canister strap and 2 carriage bolts and flange nuts (3/8 inch).
-
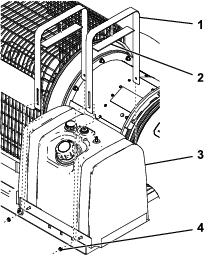
Attach the pads to the fuel-tank straps.
-
Secure the new fuel tank to the fuel-tank tray using the straps and 4 flange nuts (1/4 inch).
-
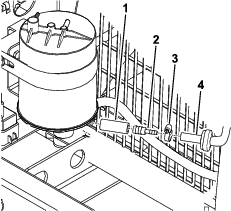
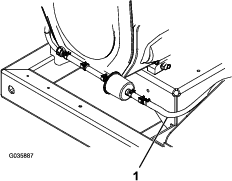
Attach the hose adapter and short hose to the inline fuel filter with a hose clamp and secure it to the bottom of the carbon canister.
-
For Models 44552, 44553, and 44554, trim 13 inches off of the 78-inch hose.
-
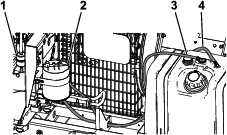
Attach the hose to the fuel tank and fuel filter using the previously removed hose clamps.
Note: Ensure that the hose is routed through the hole in the frame.
-
Attach the 1.5 m (61 inch) hose to the fuel tank and carbon canister using the previously removed hose clamps.
Note: Shorten the hose if it is too long for your machine.
-
Attach the vent line hose to the carbon canister using the previously removed hose clamp.
-
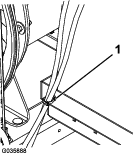
Snap the tie clip onto the side of the fuel-tank tray and secure the 2 fuel-tank hoses to it.
-
Install the previously removed battery and connect it to the machine; refer to your Operator’s Manual.
-
Install the battery cover.