The Energy Expansion Kit allows you to install 2 or 4 additional HyperCell® batteries to a machine equipped with 11 batteries, resulting in a total of 13 or 15 batteries.
Safety
Refer to your traction unit Operator’s Manual for electrical system safety information.
Installation
Preparing the Machine
-
Park the machine on a level surface.
-
Ensure that the parking brake is engaged.
-
Shut off the machine and remove the key.
-
Turn the battery-disconnect switch to the OFF position.
-
Raise the hood.
-
Use a digital multimeter to measure the voltage across the positive and negative bus bars.
The voltage should be less than 1 VDC. If the voltage is above 1 VDC, ensure that the key switch is in the OFF position and the battery-disconnect switch is in the OFF position, then check the voltage again. If the voltage is still above 1 VDC, there may be a battery fault; refer to the traction unit Service Manual or your authorized Toro distributor.
Removing the Battery Spacers and Bus Bars
Retain all removed parts for later installation.
-
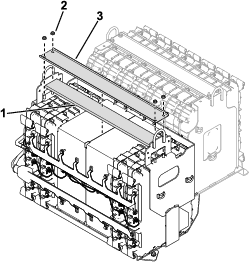
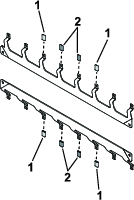
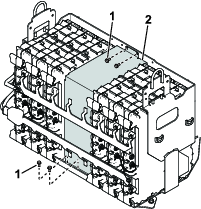
Remove the channel support and foam pad from the battery compartment that contains 4 batteries (Figure 1).

-
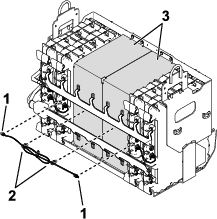
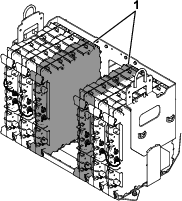
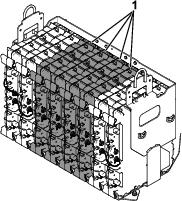
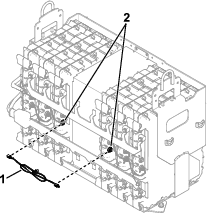
Remove the wire harness from the battery spacers and the batteries (Figure 2).
-
Remove the battery spacers (Figure 2) from the battery compartment.
If you are installing 2 batteries (13 total batteries installed on the machine), retain a battery spacer for later installation.
-
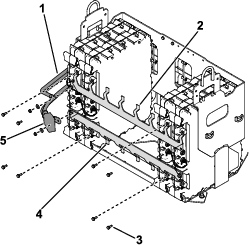
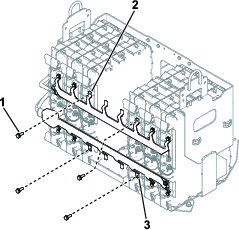
Remove the bus bars (Figure 3) from the battery compartment.

Installing the Batteries
Parts needed for this procedure:
| HyperCell® battery (sold separately; refer to your authorized Toro distributor) | 2 or 4 |
| Wire harness | 2 |
| Bolt | 4 |
-
Insert your desired amount of new batteries into the battery compartment.
-
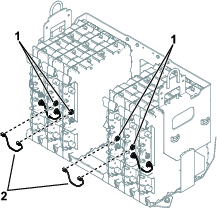
Connect the new wire harnesses to the battery ports labeled D2 (Figure 6).
-
Remove the appropriate amount of caps from the bus bars (Figure 7).
-
Perform the following steps to install the bus bars:
-
If your machine has 13 installed batteries:
-
Verify that the bus bars are seated properly and torque the bolts that you used to secure the bus bars to the batteries (Figure 3 and Figure 8) to 11 N·m (95 in-lb).
-
Install the channel support and foam pad; refer to Figure 1.
Adjusting the Rear Weight
Machines with 15 total batteries should be equipped with 1 weight on the bumper. If you installed 4 additional batteries to the machine, remove 1 of the existing weights from the bumper.
Note: Machines with 13 total batteries should be equipped with 2 weights on the bumper; no weight adjustments are needed.
-
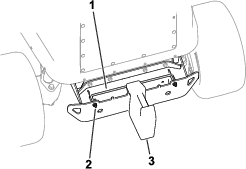
Loosen the hardware that secures the weight-lock rod to the bumper.
-
Remove a weight and position the remaining weight at the center of the bumper as shown in Figure 11
-
Tighten the weight-lock-rod hardware to secure the weight to the bumper.
Using Toro DIAG to Configure and Verify Battery Settings
Preparing to Use Toro DIAG
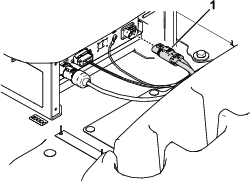
Updating the Battery Software
Note: This section only applies to an e3300 machine and a model year 2027 and newer e3200 machine.For an older e3200 machine, use the diagnostic port in the arm rest.The battery bus bars will have live voltage when the software is being updated.
Warning
The batteries contain high voltage, which could burn or shock you.
-
Use extreme care when handling a battery.
-
Use extreme care when installing or working near any batteries and battery connections.
-
Do not allow the battery terminals or battery cables to touch any metal parts of the machine.
-
Do not allow metal tools to short between the battery terminals or battery cables and metal parts of the machine.
-
Connect Toro DIAG to the machine; refer to the Toro DIAG Commercial Product User’s Guide.
-
Ensure that the software revision level for the batteries is updated by selecting the REPROGRAM button in Toro DIAG; refer to the Toro DIAG Software User’s Guide.
-
Lift the hood up to access the diagnostic port behind the seat.
-
Check and ensure the battery disconnect switch is OFF.
-
Update the battery software only using the diagnostic port behind the seat.
Note: Ensure that the battery-disconnect switch is OFF while updating the battery software. All other machine controllers will not connect to ToroDiag during this time.
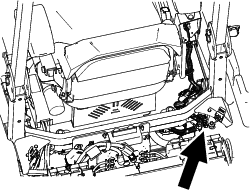
Using Toro DIAG to Configure the Battery Settings
-
Turn the battery-disconnect switch to the ON position.
-
Connect to Toro DIAG using the diagnostic port.
-
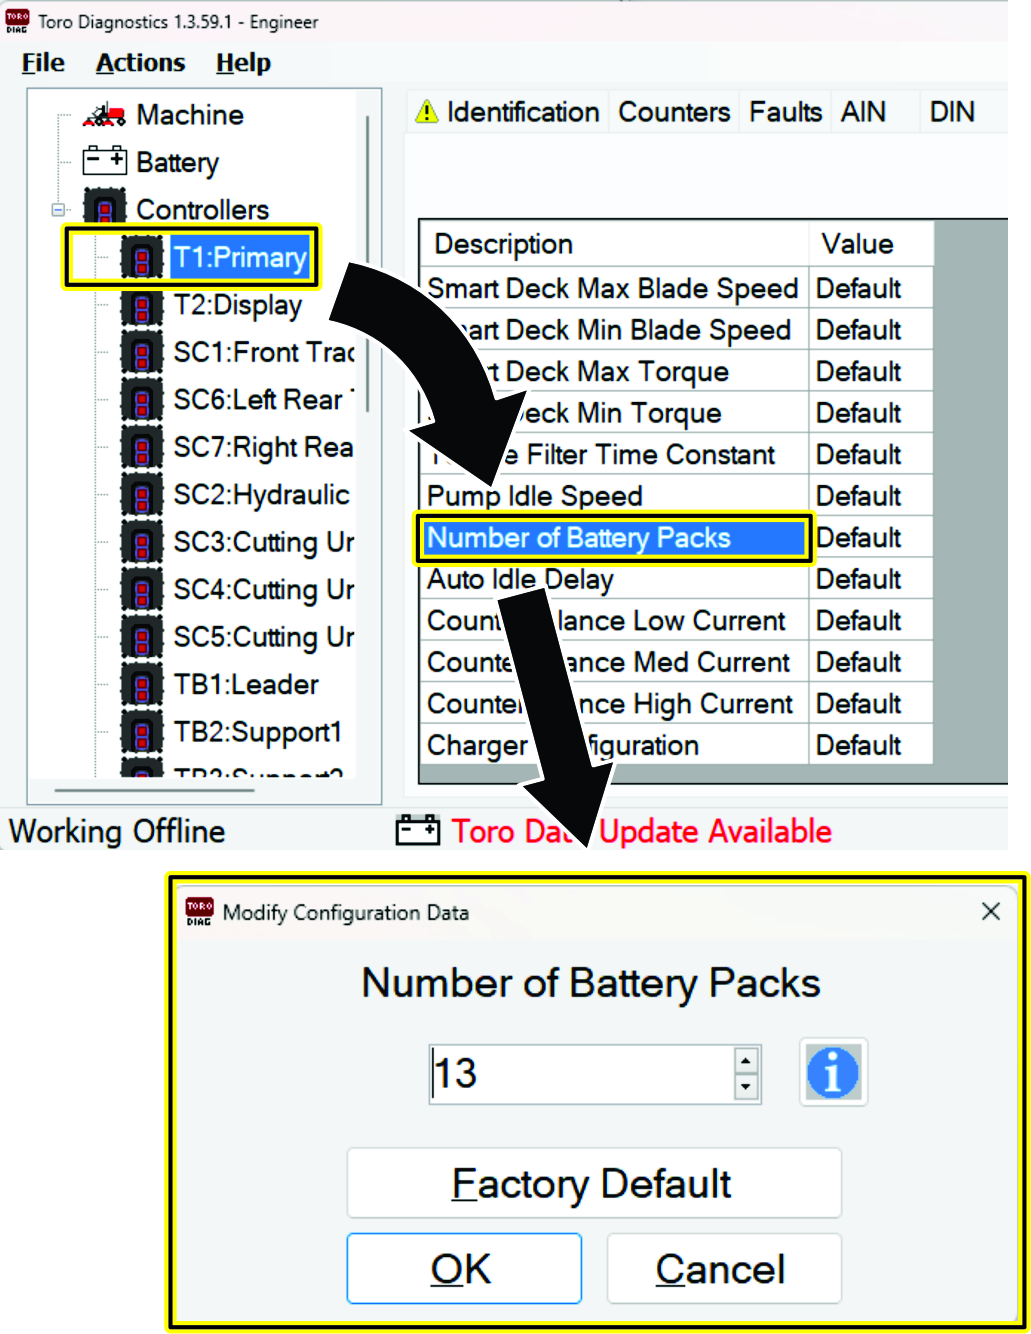
Within Toro DIAG, select PRIMARY CONTROLLER, navigate to the CONFIG tab, then enter the number of batteries that are equipped on the machine in the NUMBER OF BATTERY PACKS field.
-
Disconnect Toro DIAG from the machine.
Verifying the Battery Settings
-
Turn the battery-disconnect switch to the OFF position.
-
Install the DC power connector to the charger (Figure 13).
-
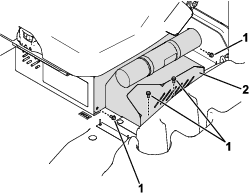
Install the charger-cable cover (Figure 12).
-
Turn the battery-disconnect switch to the ON position.
-
Charge the batteries; refer to your machine Operator’s Manual.
Note: Ensure that the new batteries are fully charged to sync up with the charge level of the existing machine batteries. This enables the batteries to connect to the machine system.
-
Perform the following steps to verify the number of active batteries on the machine:
-
Use the machine display screen to navigate to the DIAGNOSTICS menu.
-
Navigate to the BATTERY menu item, select OUTPUTS, then scroll to the PACKS READY line.
-
Verify that the number shown on the PACKS READY line matches the number of batteries that are equipped on the machine.
-
Completing the Installation
-
Verify that the battery-disconnect switch is in the ON position.
-
Verify that there are no fault codes displayed on the machine display.
-
If the display shows a U1311 fault code, the battery software does not match the machine software and the software needs to be reprogrammed using the current release of Toro DIAG.
-
If the display shows a U1151 fault code, the number of batteries on the machine does not match the amount of batteries that were configured in Toro DIAG. Connect the machine to Toro DIAG and ensure that the number of batteries on the machine matches the amount of batteries listed in Toro DIAG.
Refer to your authorized Toro distributor for any needed assistance.
-